

A kitchen that only gets a deep clean once a month tends to build up grease, crumbs, and grime faster than most people expect. A weekly kitchen cleaning checklist closes that gap, keeping the space genuinely clean between the bigger deep-cleaning sessions instead of letting small messes pile up into bigger ones. This guide is part of the Kitchen Cleaning Routines & Schedules Guide, and it lays out exactly what belongs in a realistic weekly routine, what tends to get skipped, and how to keep the whole thing manageable rather than overwhelming.
What Should You Include in a Weekly Kitchen Cleaning Checklist?
A solid weekly kitchen cleaning checklist covers the surfaces and spots that get touched, splashed, or used every day but don't need a full deep clean each time. At minimum, it should include:
- Wiping down countertops and backsplash
- Cleaning the stovetop and any visible splatter around it
- Wiping down the outside of major appliances (fridge, oven, dishwasher, microwave)
- Cleaning the inside of the microwave
- Sanitizing the sink and faucet
- Sweeping and mopping the kitchen floor
- Emptying and wiping out the trash and recycling bins
- Wiping down cabinet handles and light switches
These tasks target the areas that pick up daily grime the fastest. Anything more involved, like pulling out the fridge to clean behind it or scrubbing inside the oven, belongs on a less frequent schedule.
What Should Be Done First on a Weekly Kitchen Cleaning Checklist?
Start from the top and work down, and start with the driest tasks before the wet ones. A practical order looks like this:
- Clear clutter and put away dishes so counters and surfaces are fully accessible.
- Wipe down cabinet fronts and appliance exteriors before anything gets wet below them.
- Clean countertops and backsplash next, since crumbs and dust here often fall onto lower surfaces.
- Scrub the sink and faucet, which tends to collect the most bacteria-prone grime by the end of the week.
- Clean the stovetop, since grease here can drip down onto the floor if left for last.
- Sweep the floor, then mop.
- Take out the trash and recycling as one of the final steps, so nothing gets re-tracked in during the rest of the cleaning.
Working top to bottom and dry to wet keeps you from redoing a step because dust or crumbs fell onto a surface you already cleaned.
Countertops and Backsplash
Countertops and backsplash tiles pick up crumbs, splashes, and fingerprints constantly, which makes them one of the most important weekly tasks. Wipe down every countertop with a cleaner suited to the material, since granite, laminate, butcher block, and quartz all respond differently to the same products. A simple mix of warm water and a small amount of dish soap is safe for most sealed surfaces, though natural stone counters do better with a cleaner specifically labeled safe for stone rather than anything acidic. Backsplash tile usually just needs a damp wipe, but grout lines can trap grease over time and may need a slightly firmer scrub with a soft brush. If a stubborn stain on the counter or backsplash doesn't lift with normal wiping, it's worth checking a dedicated stain-removal resource rather than reaching for a stronger chemical that might not be safe for that particular material.
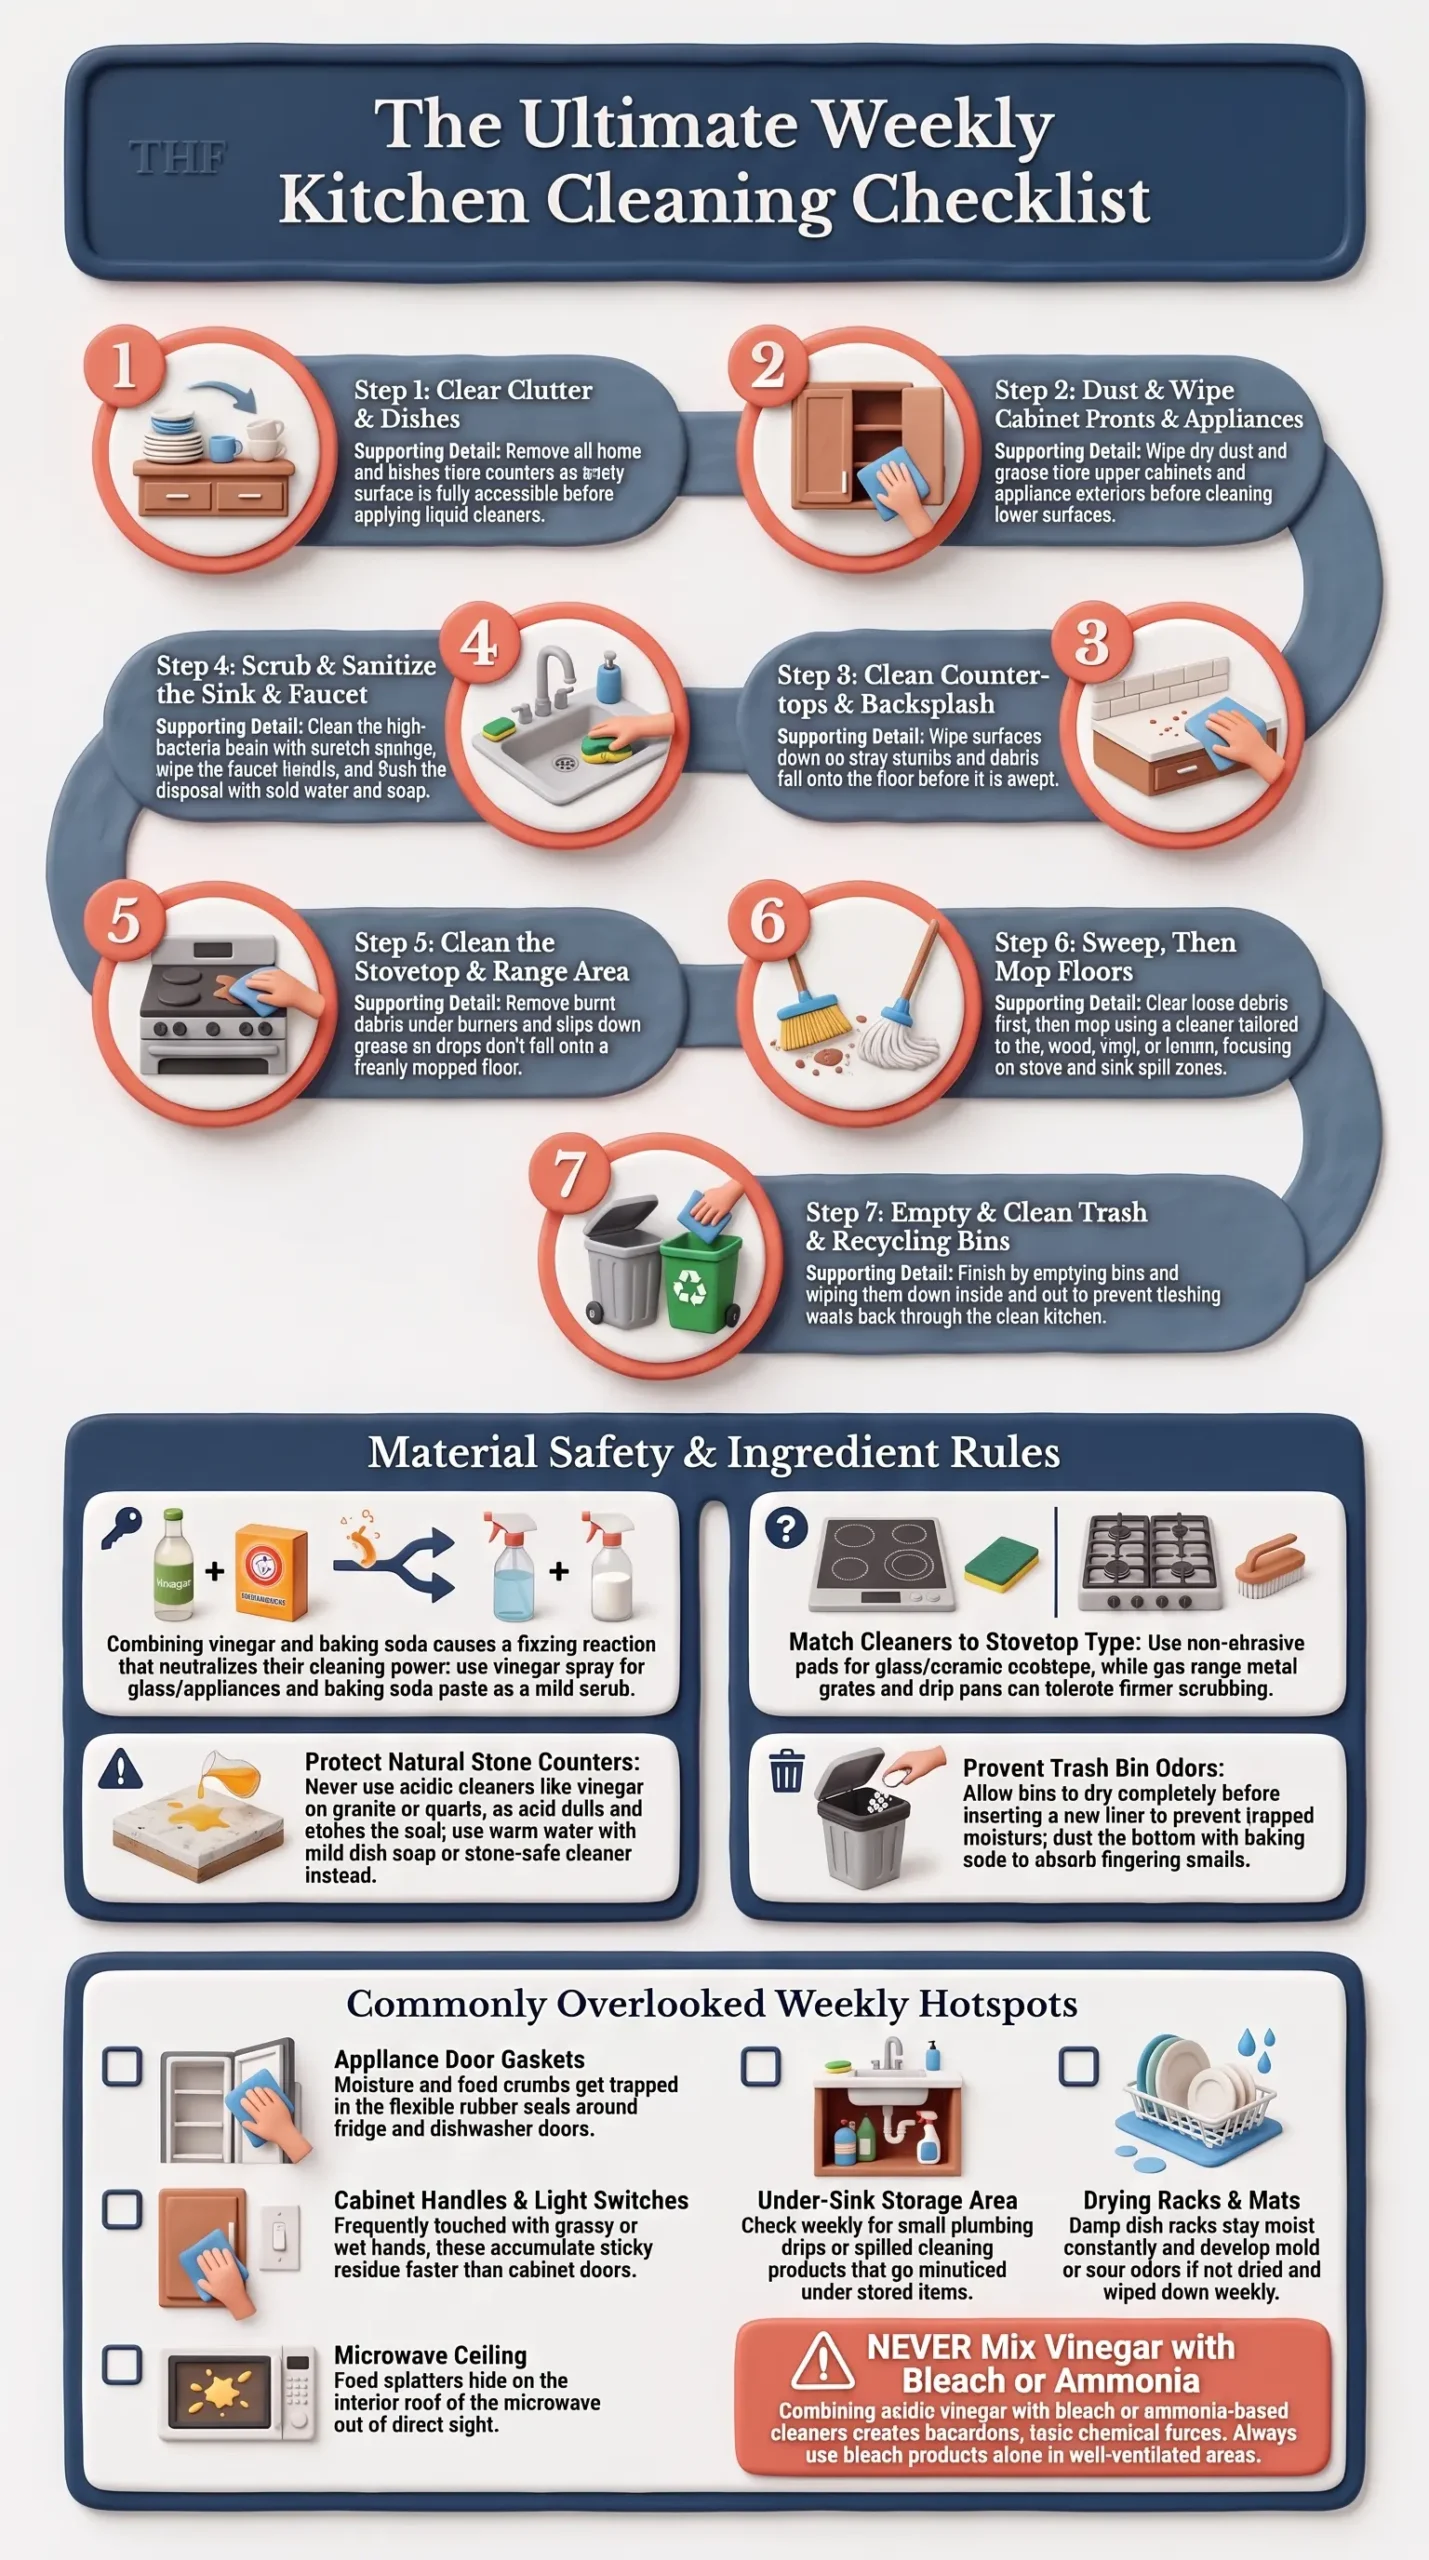
Photo Credit: Hobby Guidebook Editorial
Stovetop and Range Area
The stovetop sees more daily use than almost any other kitchen surface, and grease left sitting for a full week becomes noticeably harder to remove. Wipe down the stovetop after each use if possible, but at minimum, give it a full wipe-down once a week using a method suited to the surface: glass and ceramic tops need a gentle, non-abrasive approach, while metal grates and drip pans on a gas range can usually handle a bit more scrubbing. Check under the burners or grates for dropped food debris, which tends to burn and smoke the next time the stove is used if it isn't cleared out. The range hood filter, if your kitchen has one, is also worth a quick wipe on a weekly basis, since it collects airborne grease that a countertop wipe-down won't touch.
Sink and Faucet
The kitchen sink handles food scraps, dishwater, and raw ingredients all week, which makes it one of the areas most likely to need real sanitizing rather than just a wipe. Scrub the basin with a non-scratch sponge and a mild cleaner, paying attention to the drain area where food particles tend to collect. Wipe down the faucet, including the handle, since it gets touched constantly with wet or dirty hands. If the sink has a garbage disposal, running it briefly with cold water and a bit of dish soap helps clear out lingering food particles, though anything more involved, like addressing a persistent disposal odor, calls for a more targeted approach beyond a basic weekly wipe.
Vinegar and Baking Soda for Weekly Kitchen Cleaning
Vinegar and baking soda both have a place in a weekly routine, used separately rather than combined. A simple vinegar and water spray (roughly equal parts) works well for wiping counters, appliance exteriors, and glass, though it should be avoided on natural stone counters since the acidity can dull or etch the surface over time. Baking soda is useful as a gentle scrub for the sink basin or stovetop, since it's mildly abrasive without being harsh enough to scratch most sealed surfaces. Combining vinegar and baking soda directly causes a fizzing reaction that neutralizes much of what each ingredient does on its own, so it's more effective to use them in separate steps rather than mixing them together in one bowl.
Trash, Recycling, and Bin Care
Trash and recycling bins are easy to overlook because the bag itself gets changed regularly, but the bin underneath still collects grime, spills, and odor over time. Wipe down the inside and outside of the bin weekly with a mild cleaner, and let it air dry before putting in a new bag, since trapped moisture under a bag is a common cause of lingering smells. If the bin has a persistent odor even after wiping, a light dusting of baking soda in the bottom before adding a new bag can help absorb smells between full washes.
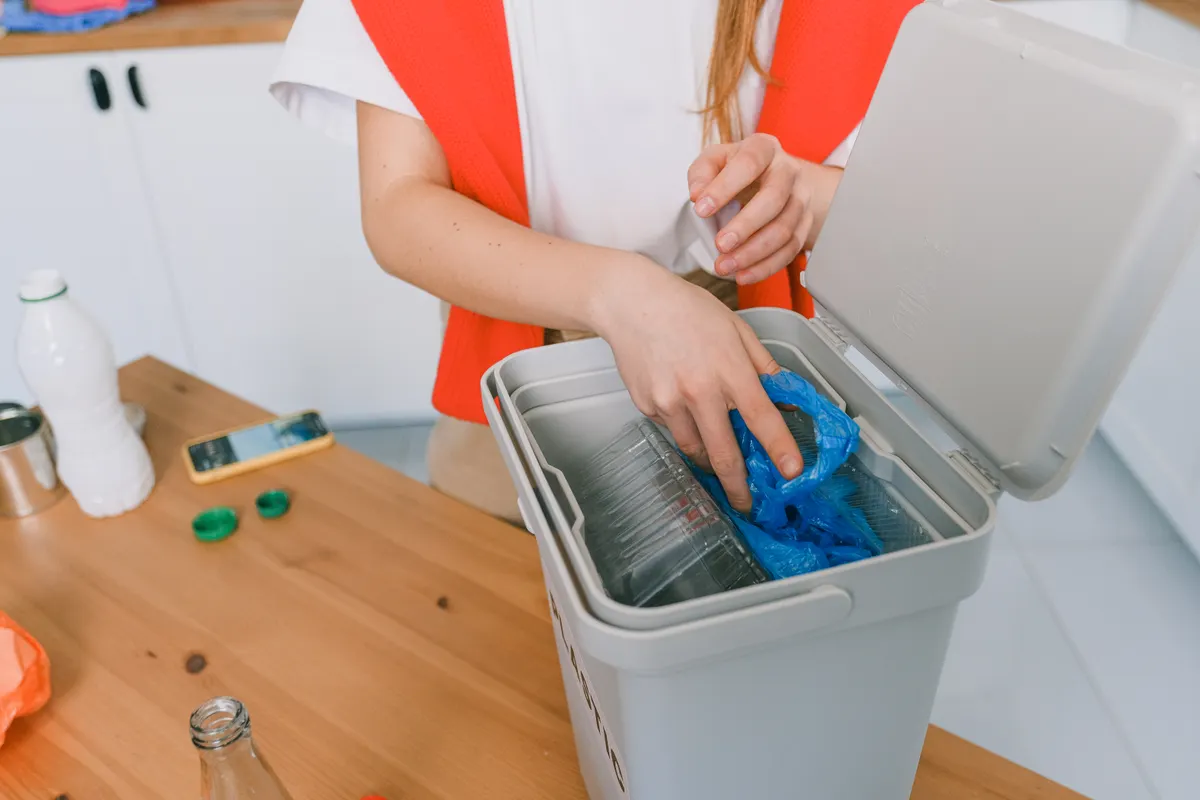
Photo Credit: SHVETS production
Floors
Kitchen floors take the most daily traffic in the whole room, along with dropped food, splashes, and pet activity if you have animals in the house. Sweep or vacuum first to remove loose debris, then mop with a cleaner suited to the flooring material, since tile, vinyl, laminate, and hardwood all have different tolerances for moisture and cleaning products. Pay extra attention to the areas right in front of the sink and stove, where spills and splatter tend to concentrate. If the floor has visible grime in corners or along baseboards that a regular mop doesn't fully lift, that's usually a sign it's due for a slightly deeper clean rather than a quick weekly pass.
Which Tasks Are Easy to Overlook?
A few kitchen spots consistently get missed in a weekly routine, even by people who are otherwise pretty thorough:
- Cabinet handles and knobs, which pick up grease from hands constantly but rarely get wiped
- Light switches near the stove or sink, often touched with wet or greasy hands
- The inside of the microwave, especially the ceiling, where splatter builds up out of sight
- Underneath the sink, where a small leak or spill can go unnoticed for weeks
- The gasket or seal around the fridge and dishwasher doors, which can trap moisture and grime
- The dish rack or drying mat, which stays damp and can develop odor if not wiped down regularly
Adding these to a checklist, even briefly, closes the gap between what feels clean and what's actually clean.
How to Tell a Weekly Kitchen Cleaning Checklist Needs Attention
A few signs suggest a kitchen task is overdue rather than just due:
- Visible grease film on the stovetop or range hood that doesn't wipe off with a quick pass
- A lingering odor near the trash bin, sink drain, or disposal that doesn't clear after normal cleaning
- Sticky residue on cabinet handles or countertops that requires more scrubbing than usual
- Visible grime buildup in floor corners or along the edges of the backsplash
- A cloudy or streaky film on stainless steel appliances that a normal wipe-down doesn't fully remove
If any of these show up consistently, it may be a sign the weekly routine needs a small adjustment, either in frequency or in which products are being used.
How Often Should You Use or Update This Checklist?
A weekly kitchen cleaning checklist works best when it's actually followed weekly, ideally on a set day so it becomes part of a regular rhythm rather than something squeezed in whenever there's time. That said, the checklist itself is worth revisiting every few months, since household habits change. A kitchen that starts seeing more cooking, more guests, or a new pet may need certain tasks bumped up in frequency, like floor mopping or trash bin wiping. Beyond the weekly routine, most kitchens also benefit from a deeper monthly session that tackles the spots a quick weekly pass doesn't reach, like the inside of the oven or behind the fridge. The Monthly Kitchen Deep Cleaning Checklist covers that next layer in detail.
How to Make a Weekly Kitchen Cleaning Checklist Practical to Follow
A checklist only works if it actually gets used, and a few small adjustments make that more likely:
- Keep the list short enough to finish in 30 to 45 minutes. A checklist that takes two hours every week is much easier to skip.
- Break it into smaller daily habits where possible, like wiping the stovetop after each use rather than saving all the grease for one weekly session.
- Store cleaning supplies where the tasks happen, so there's no delay in grabbing what's needed.
- Pick a consistent day, since a routine tied to a specific day tends to stick better than one done "whenever there's time."
- Adjust the list based on your kitchen, since a household that cooks daily needs more frequent stovetop and floor attention than one that mostly orders in.

Photo Credit: RDNE Stock project
Quick Weekly Kitchen Checklist Summary
|
Task |
Frequency |
Quick Note |
|
Countertops and backsplash |
Weekly |
Match cleaner to surface material |
|
Stovetop and range |
Weekly (wipe after use daily if possible) |
Check under grates and burners |
|
Sink and faucet |
Weekly |
Scrub basin, wipe faucet, flush disposal |
|
Microwave interior |
Weekly |
Check ceiling for splatter |
|
Trash and recycling bins |
Weekly |
Let dry fully before new bag |
|
Floors |
Weekly |
Sweep first, then mop by material type |
|
Cabinet handles, switches |
Weekly |
Commonly skipped |
If your weekly routine sometimes needs to happen fast, whether before guests arrive or just to reset after a busy week, the Weekly Kitchen Reset Routine offers a condensed version built for exactly that kind of situation. And when guests are on the way and a fuller clean feels necessary, Deep Cleaning the Kitchen Before Guests covers what to add on top of the regular weekly tasks.
Frequently Asked Questions
What should you include in a weekly kitchen cleaning checklist? Countertops, backsplash, stovetop, sink, faucet, microwave interior, trash bins, floors, and commonly missed spots like cabinet handles and light switches.
How often should you use or update a weekly kitchen cleaning checklist? Follow it weekly, ideally on a set day, and revisit the list itself every few months to adjust for changes in cooking habits or household needs.
Which tasks are easy to overlook on a weekly kitchen cleaning checklist? Cabinet handles, light switches, the inside of the microwave, under the sink, appliance door gaskets, and the dish rack or drying mat.
How can you make a weekly kitchen cleaning checklist practical to follow? Keep it short enough to finish in under an hour, break larger tasks into daily habits, store supplies where they're used, and stick to a consistent cleaning day.
What should be done first on a weekly kitchen cleaning checklist? Start with clearing clutter, then move top to bottom and dry to wet, tackling cabinets and counters before the sink, stovetop, and floors.
A Quick Note on Safety
Most weekly kitchen tasks are low-risk, but a few precautions are worth keeping in mind. Avoid using vinegar-based cleaners on natural stone counters, since the acidity can dull or etch the surface over time. Never combine vinegar with bleach or ammonia-based products, as this can produce hazardous fumes; if a task calls for bleach, use it on its own in a well-ventilated space and follow the product label's instructions. When in doubt about which cleaner suits a specific countertop, appliance finish, or flooring material, checking the manufacturer's care instructions is the safest way to avoid accidental damage.
Return to the complete kitchen cleaning guide for more routines, schedules, and task-specific guidance.





Leave a Reply