

Bathroom cabinets take on a different kind of wear than cabinets anywhere else in the house. They sit close to a sink that splashes, near a shower that puts moisture into the air, and often store the cleaning products, medications, and toiletries that get grabbed with wet hands multiple times a day. That combination of humidity and daily handling is why bathroom cabinet cleaning needs its own approach, separate from kitchen cabinets or general furniture care.
This guide walks through everything you need to know about cleaning bathroom storage and cabinet, with a bathroom storage and cabinet cleaning step-by-step guide for the most common materials, plus a checklist to keep the routine simple. If you want the full picture of bathroom care first, you can go Back to the complete bathroom cleaning guide.
The Best Way to Clean Bathroom Cabinets
The most effective method clears the space first, then works from the inside out so nothing gets missed. Here is the short version:
- Remove everything from the cabinet or drawer.
- Vacuum or wipe out loose dust and debris.
- Wipe interior surfaces with a cleaner suited to the material.
- Clean the exterior, including handles and hinges.
- Let everything dry fully before restocking.
- Return items, checking expiration dates and grouping like with like.
This order matters because cleaning around items left inside a cabinet just means missing corners and edges where dust, hair, and product residue actually collect. Emptying the space first also gives you a natural moment to toss expired products, a step that's easy to skip otherwise.
How Often You Should Clean Bathroom Cabinets
Bathroom cabinets don't need daily attention the way a sink or shower does, but they still need a more regular routine than most storage in the house. A general schedule looks like this:
- Weekly: A quick wipe of cabinet exteriors and handles, since these get touched with wet or soapy hands constantly.
- Monthly: A full interior wipe-down of shelves and drawers, including a quick check for any dust or spilled product residue.
- Every 3 to 6 months: A deeper clean where everything is removed, surfaces are wiped thoroughly, and expired products are cleared out.
Homes with higher humidity, or bathrooms without strong ventilation, may need the interior check done more often, since trapped moisture inside a cabinet can encourage mildew even if the exterior looks fine. Households storing cleaning chemicals or medications should also check expiration dates on that more frequent monthly schedule rather than waiting for the deeper seasonal clean, simply because expired products in those categories can lose effectiveness or, in some cases, become unsafe to use.
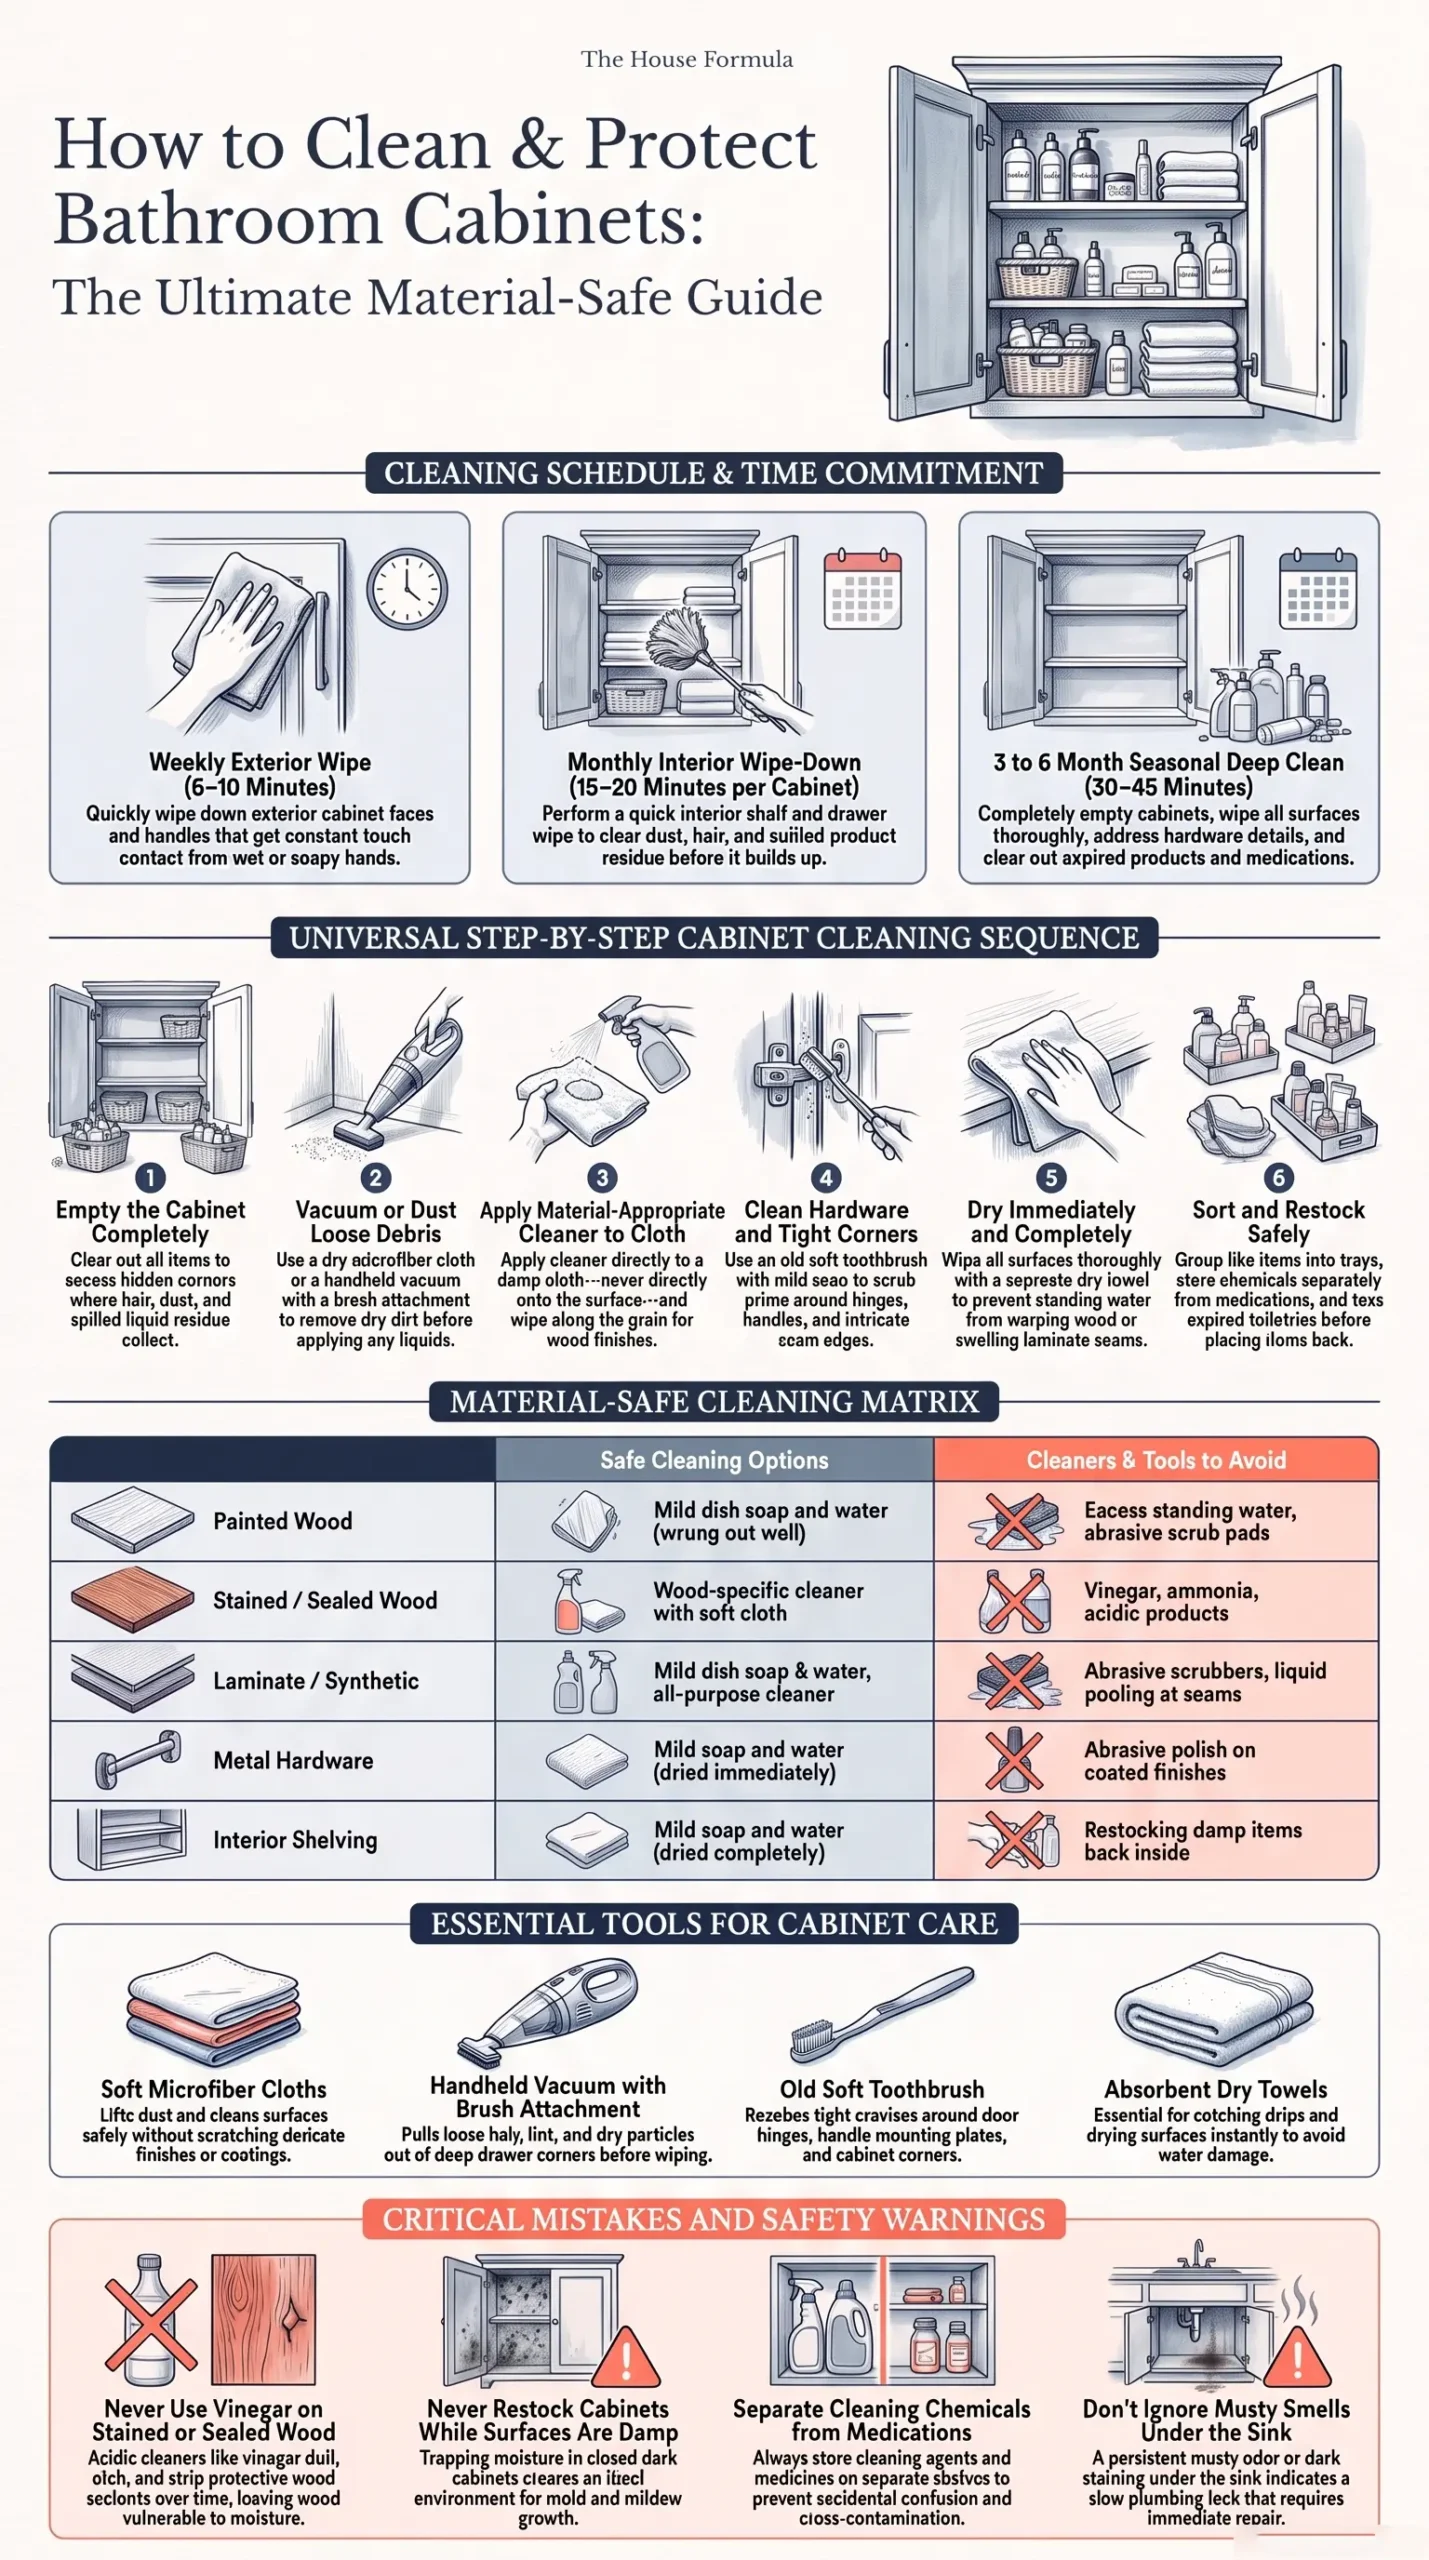
Photo Credit: Hobby Guidebook Editorial
What Products Are Safe for Cabinet Cleaning
Cabinet materials vary more than most bathroom surfaces, and matching the cleaner to the material is the single biggest factor in avoiding damage.
|
Material |
Safe Options |
Avoid |
|
Painted wood |
Mild dish soap and water, wrung out well |
Excess water, abrasive pads |
|
Stained or sealed wood |
Wood-specific cleaner, soft cloth |
Vinegar, ammonia-based cleaners |
|
Laminate |
Mild dish soap and water, all-purpose cleaner |
Abrasive scrubbers, excess standing water |
|
Metal hardware (handles, hinges) |
Mild soap and water, dried thoroughly |
Abrasive polish on coated finishes |
|
Interior shelving (any material) |
Mild soap and water, dried completely before restocking |
Storing damp items back inside |
Important: Stained or sealed wood cabinets should never be cleaned with vinegar or other acidic products, since acid can dull the finish or strip the seal over time, similar to how it affects natural stone. A wood-specific cleaner, used sparingly with a soft cloth, is the safer choice for most finished wood bathroom cabinets.
Water is the bigger long-term risk for any bathroom cabinet, regardless of material. A well-wrung cloth, rather than a soaked one, protects both painted and stained wood from the swelling, warping, or peeling that standing moisture can cause over time. Always check any manufacturer care instructions for your specific cabinet finish when available, since some factory finishes have narrower product recommendations than general wood care advice.
Tools That Make the Job Easier
A short list of tools covers most bathroom cabinet cleaning tasks:
- A soft microfiber cloth for wiping down both interior and exterior surfaces without scratching the finish.
- A handheld vacuum with a brush attachment, useful for pulling dust and hair out of drawer corners before wiping.
- An old soft toothbrush, handy for cleaning around hinges, handles, and other small hardware details.
- A dry towel, kept nearby to catch drips and dry surfaces immediately after wiping.
- A small bin or tray, useful for sorting items as you empty a cabinet so restocking goes faster.
Skip abrasive sponges and scouring pads on any cabinet finish, painted or stained. These can scratch through a protective coating, and once that coating is compromised, the wood underneath becomes far more vulnerable to the moisture that's already common in a bathroom.
Step-by-Step: Cleaning Wood Bathroom Cabinets
Wood cabinets bring warmth to a bathroom, but they're also the material most sensitive to the moisture this room deals with constantly.
- Empty the cabinet completely, giving you a clear view of the interior surfaces and any spots that need extra attention.
- Dust first. Use a dry microfiber cloth or a vacuum brush attachment to remove loose debris before introducing any liquid.
- Apply a wood-appropriate cleaner to a soft cloth, never directly to the wood, and wipe with the grain rather than against it.
- Address stubborn spots gently. A small amount of extra cleaner and a little more time, rather than more pressure, usually lifts residue without risking the finish.
- Dry immediately with a separate clean cloth, since leftover moisture is what causes most long-term wood cabinet damage in a bathroom.
- Check hinges and handles for grime buildup, cleaning these separately with mild soap and a soft brush if needed.
Painted wood and stained wood respond differently to the same cleaner, so it's worth confirming which finish you have before starting, especially if you're unsure whether a product is safe. For a closer look at finish identification, conditioning, and handling common wood-specific issues like fading or minor scratches, see the full Wood Bathroom Cabinet Cleaning guide.
Step-by-Step: Cleaning Laminate and Other Non-Wood Cabinets
Laminate and similar synthetic surfaces hold up well to bathroom moisture, but they still benefit from the right cleaning approach.
- Empty and dust the cabinet, just as with wood, to avoid pushing debris around during wiping.
- Apply a mild cleaner, either dish soap and water or an all-purpose cleaner, to a damp (not soaking) cloth.
- Wipe interior and exterior surfaces, paying attention to corners and edges where grime tends to build up first.
- Rinse with a separate damp cloth if you used a stronger cleaner, to prevent a sticky residue film.
- Dry thoroughly before restocking, since laminate seams can be vulnerable to moisture in a way similar to laminate flooring.
Laminate is generally more forgiving than wood, but it's still worth avoiding excess standing water, especially around seams and edges where moisture can work its way underneath the surface layer over time.
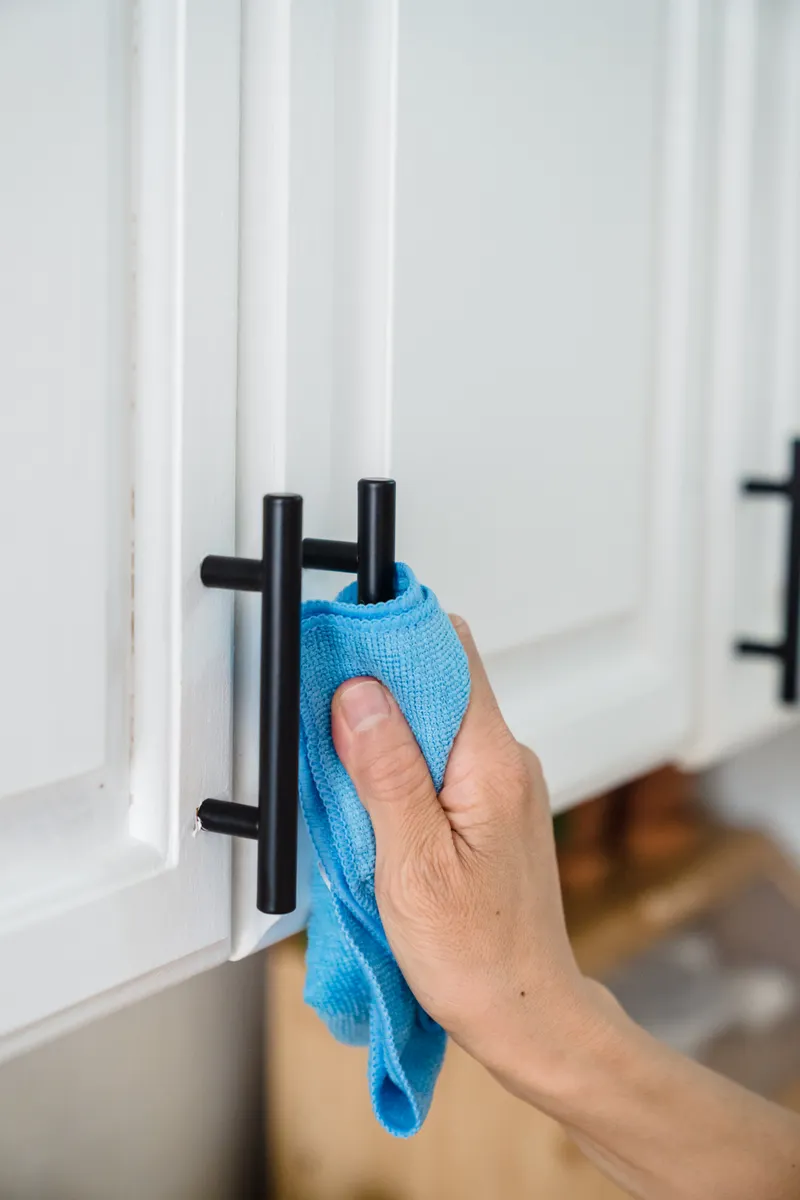
Photo Credit: Liliana Drew
Organizing While You Clean
A deeper cabinet clean is also the easiest time to reset how things are stored, since everything is already out and in front of you.
- Group like items together, keeping medications, cleaning products, and toiletries in separate sections rather than mixed together.
- Check expiration dates on medications, sunscreen, and certain cosmetics, since bathroom humidity can shorten shelf life on some products faster than dry storage would.
- Store cleaning chemicals away from medications, ideally on separate shelves, to avoid confusion and reduce risk if young children or pets can access the cabinet.
- Use bins or trays for smaller items, which makes wiping the shelf underneath much faster next time.
- Elevate items off the cabinet floor where possible, since this is the area most likely to get damp first if there's ever a leak.
If you're looking for a more detailed approach to organizing bathroom storage long term, including drawer dividers, vertical space, and shared-bathroom systems, see the Bathroom Vanity & Cabinet Organization Guide.
Handling Water Damage and Under-Sink Leaks
The area under a bathroom sink is one of the most common places for hidden water damage to develop, since a slow leak can go unnoticed for weeks behind stored items.
Check under the sink periodically for a musty smell, soft or swollen wood, or dark staining on the cabinet floor, all of which point to moisture getting in from somewhere. A supply line or drain connection that's slightly loose is a common, fixable cause, but confirming the source usually means removing everything and looking closely at the pipes themselves.
If you catch water damage early, drying the area thoroughly and addressing the leak source can often prevent it from getting worse. More advanced damage, including soft or delaminating wood, generally needs a different approach than routine cleaning. For a full breakdown of identifying leak sources, drying out a damp cabinet, and knowing when repair or replacement makes more sense than cleaning, see the Removing Water Damage from Bathroom Cabinets guide.
What to Avoid When Cleaning Bathroom Cabinets
A few habits cause more harm than good, even with good intentions.
- Avoid vinegar or acidic cleaners on stained or sealed wood, since acid can dull or strip the finish over time.
- Avoid abrasive scrubbers on any cabinet material, painted, stained, or laminate.
- Avoid restocking a cabinet while it's still damp, since trapped moisture inside a closed space encourages mildew.
- Avoid storing cleaning chemicals and medications on the same shelf, particularly in households with young children.
- Avoid ignoring a musty smell under the sink, since this is often an early sign of a slow leak rather than something that will resolve on its own.
How to Clean Cabinets Without Damaging Them
A few habits protect bathroom cabinets long term, regardless of material:
- Identify the cabinet finish before choosing a cleaner, rather than assuming one product works everywhere.
- Use a well-wrung cloth by default, especially on wood.
- Dry every surface fully before closing the cabinet or restocking items.
- Check under-sink cabinets periodically for early signs of leaks.
- Follow manufacturer care instructions for your specific cabinet finish when available, since factory coatings vary in what they can tolerate.
Common Mistakes to Avoid
Even careful homeowners fall into a few repeat mistakes:
- Using the same cleaner on every cabinet material. A product safe for laminate isn't always safe for stained wood.
- Cleaning around items instead of emptying the cabinet first. This leaves corners and edges with dust and residue that never actually gets addressed.
- Skipping hardware like handles and hinges. These collect grime from constant touching but are easy to overlook during a standard wipe-down.
- Restocking before surfaces are fully dry. This traps moisture inside a closed space, which is exactly the environment mildew needs to develop.
- Never checking under the sink. A slow leak here can cause real damage long before it becomes visible from the outside.

Photo Credit: Seher Kibar
How Long a Full Cabinet Clean Takes
A routine weekly wipe of cabinet exteriors and handles takes about 5 to 10 minutes. A full monthly interior clean, including emptying and wiping shelves, typically takes 15 to 20 minutes per cabinet. The deeper seasonal clean, which includes sorting, checking expiration dates, and addressing hardware, can take 30 to 45 minutes depending on how much has accumulated since the last deep clean.
Bathroom Storage and Cabinet Cleaning Checklist
Use this quick checklist for a thorough cabinet clean:
- Empty the cabinet or drawer completely.
- Dust or vacuum loose debris.
- Wipe interior surfaces with a material-appropriate cleaner.
- Clean exterior surfaces, handles, and hinges.
- Dry everything fully before restocking.
- Check expiration dates on medications and toiletries.
- Group similar items together when restocking.
- Check under-sink cabinets for signs of leaks or moisture.
Frequently Asked Questions
What is the best way to clean bathroom storage and cabinet? Empty the space first, dust away loose debris, wipe surfaces with a cleaner matched to the material, clean handles and hinges, and let everything dry fully before restocking.
How often should you clean bathroom storage and cabinets? Wipe exteriors and handles weekly, do a full interior wipe-down monthly, and complete a deeper clean with expired product checks every 3 to 6 months.
What cleaning products are safe for bathroom storage and cabinets? Mild dish soap and water works for most materials. Stained or sealed wood needs a wood-specific cleaner, since vinegar and other acidic products can strip the finish.
What should you avoid when cleaning bathroom storage and cabinets? Avoid abrasive scrubbers on any finish, avoid vinegar on stained wood, and avoid restocking a cabinet before it's fully dry.
How can you clean bathroom storage and cabinets without damaging them? Identify the material first, use a well-wrung cloth, dry surfaces completely, and check under-sink areas periodically for early signs of leaks.
What common mistakes should you avoid with bathroom storage and cabinets? Using one cleaner on every material, cleaning around stored items instead of emptying the cabinet, skipping hardware, and never checking under the sink.
For the full room-by-room approach to bathroom care, See the full bathroom cleaning guide.
A Quick Note on Safety
Bathroom cabinets often store cleaning products and medications together, so a few precautions are worth keeping in mind. Store chemicals and medications on separate shelves, and never combine leftover cleaning products in the same container. If you find a bottle with a damaged or missing label, it's safer to dispose of it than to guess its contents. If you discover significant water damage or persistent mold under a sink, drying the area and cleaning the surface may not be enough, and a plumber or repair professional may be needed to address the underlying source.


Leave a Reply