

The base and exterior of a toilet don't get the same attention as the bowl, but they collect just as much grime over time. Dust settles on the tank, splashes dry along the sides, and the seam where the toilet meets the floor traps moisture that can lead to mold or mildew if it's ignored for too long. Toilet base cleaning matters not just for appearance, but because that floor seam is one of the more common spots for hidden buildup in the whole bathroom.
This guide covers the best way to clean a toilet's base and exterior, how often it needs attention, which products are safe on the mix of porcelain, plastic, and metal parts involved, and how to handle the specific flooring material around your toilet without causing damage. This article is Part of Toilet Cleaning Guide, which covers full toilet care from the tank to the floor.
Why the Base and Exterior Need Different Care
Bathroom cleaning as a whole deals with moisture problems that other rooms rarely face, and the toilet base is one of the clearest examples of this. Unlike a countertop or a piece of furniture, the base sits directly on the floor in a spot that gets splashed, stepped near, and exposed to humidity every single day. That constant low-level moisture is exactly the kind of condition that lets mold and mildew take hold, especially in the narrow seam between the base and the floor where air doesn't circulate well.
The materials involved also differ from what you'd find on the bowl itself. The bowl is almost always straightforward porcelain, but the base and exterior often mix porcelain with plastic bolt caps, chrome or brass hardware, and whatever flooring material surrounds it, whether that's tile, vinyl, laminate, or natural stone. Each of these reacts differently to cleaning products, which is why a single all-purpose approach doesn't always work as well here as it does elsewhere in the bathroom.
Tools Needed for Toilet Base and Exterior Cleaning
Having the right tools on hand makes this task faster and reduces the risk of scratching a surface by accident.
- A soft microfiber cloth or sponge for the tank, bowl exterior, and hardware
- An old toothbrush or small detail brush for the floor seam and around bolt caps
- A mild all-purpose bathroom cleaner or a vinegar and water solution
- Baking soda for a gentle scrubbing paste on porcelain
- A dry towel for drying the base seam after cleaning
- Rubber gloves, especially if using a disinfecting product
- A flashlight, useful for checking the seam and caulk line for early signs of discoloration that are easy to miss in normal bathroom lighting
Most of these are things households already have on hand, which makes toilet base cleaning one of the more accessible bathroom tasks compared to jobs that require specialized equipment.
The Best Way to Clean a Toilet Base and Exterior
- Start at the top and work down. Wipe the tank exterior first with a damp cloth and mild cleaner, since dust and grime higher up can fall and land on areas you've already cleaned if done out of order.
- Clean the sides and back of the bowl, using a cloth or sponge with an all-purpose bathroom cleaner, paying attention to any splashed areas that have dried and hardened.
- Wipe down the bolt caps and hinges, which are usually plastic, chrome, or occasionally brass, using a soft cloth to avoid scratching a plated finish.
- Clean the base where it meets the floor, using a small brush or an old toothbrush to reach into the seam between the toilet base and the floor tile or flooring material.
- Use a flashlight to check the seam once it's been wiped down, looking for any dark discoloration, softness in the caulk, or gaps that weren't obvious under regular lighting.
- Dry the base and floor seam thoroughly with a clean towel, since leftover moisture in this seam is one of the main reasons mold or mildew develops at the base over time.
- Check the caulk line around the base, if your toilet has one, for discoloration or gaps, which can indicate it's time to clean more thoroughly or eventually recaulk.
Drying the base seam after cleaning is easy to skip, but it's one of the more important steps here. A damp seam left to air dry slowly gives mold far more opportunity to take hold than one that's dried with a towel right away. This single habit, more than any specific product, tends to make the biggest difference in how well the base holds up between deep cleans.
How to Tell When the Base Needs Extra Attention
A few signs point to a base and exterior that need more than the usual quick wipe:
- A musty smell near the floor that isn't present anywhere else in the bathroom, which often points to trapped moisture in the seam or under a failing caulk line.
- Dark spots or discoloration along the caulk line or grout closest to the toilet base.
- A sticky or tacky feel on the floor immediately around the base, usually from dried splashes that have built up in layers over time.
- Visible rust-colored staining near metal bolt caps, which can develop when moisture sits against hardware for extended periods.
- A caulk line that feels soft, spongy, or is pulling away from the floor, which suggests moisture has already gotten underneath it.
Catching these signs early usually means a more thorough cleaning session solves the problem. Left unaddressed for months, the same issues can progress into mold that's harder to remove or, in more serious cases, damage to the flooring underneath.
How Often Should You Clean a Toilet Base and Exterior
|
Task |
Suggested Frequency |
|
Quick wipe of tank and bowl exterior |
Weekly |
|
Full base and floor seam clean |
Every 2 to 3 weeks |
|
Caulk line check |
Monthly |
|
Bolt cap and hinge wipe-down |
With every full clean |
|
Flashlight inspection of the seam |
Every 2 to 3 months |
Households with young children or anyone who may miss the bowl more often may need to wipe down the base and surrounding floor more frequently than this general schedule suggests. Bathrooms with poor ventilation also tend to develop moisture-related buildup at the base faster, which can call for more frequent checks of that floor seam specifically. If your bathroom lacks an exhaust fan or has a history of condensation on the walls or mirror, treat the base and seam as needing attention closer to every one to two weeks rather than the longer interval.

Photo Credit: Hobby Guidebook Editorial
What Cleaning Products Are Safe for a Toilet Base and Exterior
Generally safe:
- Mild all-purpose bathroom cleaner, suitable for porcelain, plastic, and most painted surfaces
- A vinegar and water solution, useful for general grime and mild mineral deposits on porcelain
- A baking soda and water paste, for light scrubbing on porcelain without scratching
- Dish soap and warm water, a gentle option for daily wipe-downs of the tank and bowl exterior
Use with caution:
- Vinegar directly on chrome or brass bolt caps and hinges, since prolonged or frequent acidic contact can dull certain plated finishes over time
- Bleach-based cleaners near caulk lines, since bleach can discolor some caulk formulas with repeated use
- Any acidic cleaner on natural stone flooring around the base, since stone reacts differently to acids than tile, vinyl, or laminate does
Avoid:
- Abrasive powders or scouring pads on painted or plastic exterior parts, which can scratch or dull the finish
- Mixing bleach with vinegar or ammonia, which can release hazardous fumes in an enclosed bathroom space
- Harsh acidic cleaners on natural stone flooring around the toilet base, since stone reacts differently to acids than tile or vinyl
Manufacturer guidance should take priority for toilets with specialty finishes, colored porcelain, or unique hardware, since not all coatings respond the same way to every cleaner. When in doubt about a specific finish, testing a product on a small, hidden section of the surface first is a reasonable precaution before applying it broadly.
Eco-Friendly Way to Clean a Toilet Base and Exterior
Vinegar and baking soda are two of the most useful household ingredients for this task, and they work well without relying on stronger commercial chemicals. Vinegar diluted with water, roughly equal parts, cuts through general grime and mild buildup on porcelain and most exterior surfaces, while a baking soda paste made from baking soda and a small amount of water offers gentle mechanical scrubbing power without scratching. Together, they cover most of what's needed for routine base and exterior cleaning.
For the floor seam specifically, a paste of baking soda applied with an old toothbrush, left to sit for a few minutes before scrubbing, tends to lift dried grime without needing anything stronger. Wiping the paste away with a damp cloth afterward, then drying the seam thoroughly, completes the eco-friendly approach without introducing any harsher chemicals into a small, enclosed space.
That said, vinegar and baking soda aren't a fix for everything. Sanitizing surfaces that have had direct contact with waste, such as the base of the bowl or the floor immediately around it, still benefits from an actual disinfecting product afterward, since vinegar and baking soda clean and help with odor but don't offer the same level of germ-killing as a dedicated disinfectant. Think of the eco-friendly approach as excellent for routine grime and buildup, with a disinfecting pass reserved for times when actual sanitizing matters, such as after illness in the household.
Cleaning Around Different Floor Types
The flooring material surrounding your toilet base plays a real role in what's safe to use during cleaning, and it's worth knowing which type you're working with before reaching for a stronger product.
Ceramic or Porcelain Tile
Tile is generally the most forgiving flooring material near a toilet base. It holds up well to vinegar, mild all-purpose cleaners, and baking soda paste. The main area of concern is the grout lines, which are more porous than the tile itself and can stain or discolor if a strong colored cleaner is used repeatedly. A soft brush works well for grout near the base without risking scratches to the tile surface.
Vinyl or Linoleum
Vinyl and linoleum flooring are also fairly durable against mild cleaners, but they can be more sensitive to abrasive scrubbing, which may dull the surface finish over time. Stick to a soft cloth or sponge rather than a stiff brush directly on the vinyl itself, saving any firmer scrubbing for the seam where it meets the toilet base.
Natural Stone
Natural stone, such as marble or travertine, reacts poorly to acidic cleaners including vinegar, which can etch or dull the stone's surface with repeated contact. If your bathroom floor is natural stone, a pH-neutral stone cleaner or plain mild soap and water is the safer choice near the toilet base, and vinegar should be avoided on this surface entirely.
Laminate or Hardwood-Look Flooring
Laminate flooring can be sensitive to standing moisture, since water that seeps into seams between planks can cause swelling or warping over time. This makes thorough drying after cleaning even more important near a toilet base sitting on laminate, and it's worth avoiding excess water during the cleaning process itself, using a damp rather than wet cloth whenever possible.
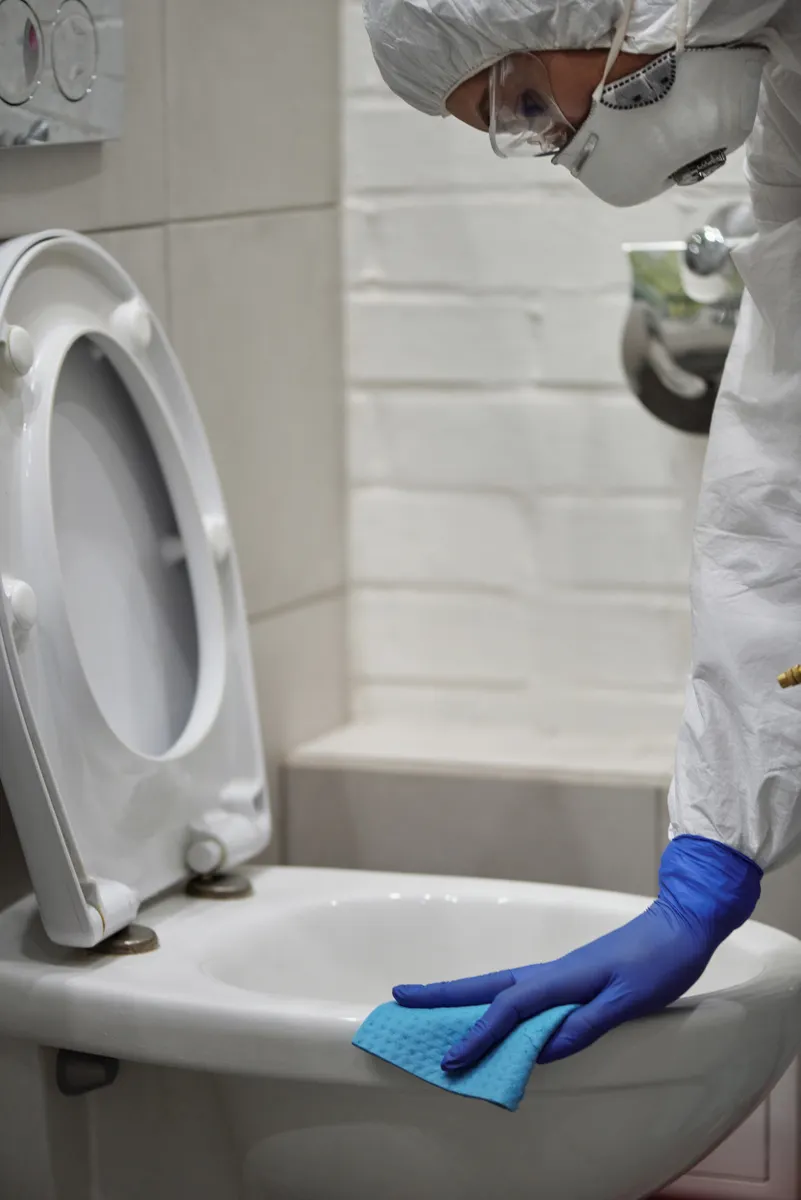
Photo Credit: Matilda Wormwood
Cleaning a Toilet Base and Exterior Without Scratching the Surface
Porcelain and plastic exterior surfaces are more prone to fine scratching than people expect, especially with repeated use of abrasive pads or scouring powders over time. Once a surface is scratched, grime tends to settle into those grooves and becomes harder to clean out with each pass, which can create a cycle where the area looks dirty again faster than it should.
A soft cloth or sponge is enough for almost all base and exterior cleaning tasks. Save any scrubbing brush for the bowl interior, where the material and buildup are different and can handle more physical effort without the same scratching risk.
For the base seam specifically, an old toothbrush works well since its bristles are soft enough not to scratch tile or porcelain but firm enough to get into a tight seam. Avoid metal tools or anything with a hard edge in this area, since scraping at dried buildup with something rigid risks chipping tile grout or scratching the toilet base itself.
If your toilet has a caulk line at the base, avoid scrubbing directly on it with anything abrasive. Caulk is softer than tile or porcelain and can tear or pull away from repeated hard scrubbing, which then creates a gap where moisture and grime collect even more easily.
Dealing With Rust Stains and Hard Water Marks at the Base
Two problems show up at the toilet base more than almost anywhere else in the bathroom: rust staining around metal hardware and hard water marks where water regularly splashes or drips.
Rust stains typically appear as an orange or reddish-brown discoloration near bolt caps or on the floor directly beneath them. This usually happens when moisture sits against metal hardware for an extended period, especially with older bolts or caps that aren't fully rust-resistant. A paste of baking soda and water, left to sit for several minutes before gently scrubbing with a soft brush, can lift light rust staining from porcelain or tile without needing a harsher rust remover. For more stubborn rust, a product specifically formulated for rust stains on tile or porcelain may be needed, but these should be used according to the label and tested on a small area first, since some rust removers are acidic enough to affect grout color or certain floor finishes.
Hard water marks, by contrast, usually show up as a chalky white or grayish residue where water has dried repeatedly in the same spot. Diluted vinegar is generally effective here, left to sit for a few minutes on porcelain before wiping away. As noted above, vinegar isn't the right choice for natural stone flooring, where a stone-safe cleaner should be used instead for the same hard water buildup.
Common Mistakes When Cleaning a Toilet Base and Exterior
- Skipping the floor seam entirely. This hidden strip around the base is one of the most common spots for hidden mold growth in the whole bathroom.
- Using the same cloth from the bowl on the exterior. This spreads bacteria to surfaces that get touched more directly, like the tank lid or bolt caps.
- Leaving the base seam wet after cleaning. Moisture left in this tight space encourages mildew far more than a quick towel dry would.
- Scrubbing chrome or brass hardware with vinegar too often. Occasional use is fine for most finishes, but frequent acidic contact can dull certain plated coatings faster than a mild soap and water approach would.
- Ignoring a discolored or cracked caulk line. This is often the first visible sign that moisture is getting underneath the caulk, which can lead to bigger issues at the floor if left unaddressed.
- Using vinegar on natural stone flooring. This is one of the more damaging mistakes possible here, since the etching it causes on stone isn't something a cleaning routine can undo afterward.
- Assuming a rust stain will disappear with regular cleaner. Standard all-purpose cleaners usually don't touch rust staining, and repeated scrubbing without the right approach can wear down the surface underneath without actually removing the stain.
Photo Credit: Liliana Drew
Caulk Line Care and When to Recaulk
The caulk line around a toilet base, when present, serves a real purpose: it seals the gap between the toilet and the floor, keeping moisture from seeping underneath where it can't easily dry out. Over time, caulk can crack, discolor, or pull away from either the toilet or the floor, and once that happens, it stops doing its job effectively.
During a flashlight inspection, look for these signs that recaulking may be needed rather than just cleaning:
- Visible cracks running through the caulk line
- Sections where the caulk has separated from the toilet base or the floor
- A soft or spongy feel when pressed gently
- Persistent discoloration that doesn't improve after cleaning
If the caulk is intact but simply dirty or slightly discolored, a gentle cleaning with a soft brush and mild soap usually restores its appearance. If it's cracked or separating, cleaning won't resolve the underlying issue, and the old caulk typically needs to be removed and replaced. Recaulking a toilet base is a manageable DIY task for many households, involving removing the old caulk, cleaning and drying the area completely, then applying a new bathroom-safe caulk in a thin, even line. For anyone unfamiliar with the process or uncomfortable doing it themselves, this is also a small job that many handypersons or plumbers can complete quickly and affordably.
When Base Cleaning Connects to Other Toilet Tools
A toilet brush and its holder sit right next to the base, and they're often just as overlooked. A holder that collects water and grime at its base can actually contribute to the same moisture problems you're trying to clean up around the toilet itself. If the area around your toilet base tends to stay damp or grimy no matter how often you clean it, it's worth checking whether the brush holder is part of the issue, covered in Toilet Brush & Holder Cleaning.
For households with a bidet attachment installed, the hardware and hose connections near the base need their own cleaning approach as well, since these parts sit close to the floor and can be exposed to the same splashing and moisture that affects the toilet base itself. That process is covered separately in Bidet Attachment Cleaning.
Preventing Moisture Buildup Around the Base
Cleaning addresses buildup after it happens, but a few habits can reduce how often serious buildup occurs in the first place. Running a bathroom exhaust fan during and after showers helps cut down on the ambient humidity that settles onto the floor and base over time. Wiping up splashes near the base as they happen, rather than letting them dry and harden, also means each cleaning session takes less effort and less product.
For households in humid climates or older bathrooms without great ventilation, a small dehumidifier or simply keeping the bathroom door open when not in use can help the floor around the toilet base dry out more consistently between cleanings. None of these steps replace regular cleaning, but they do reduce how quickly grime, mildew, and hard water marks reappear after a thorough clean.
When to Call a Professional
Most toilet base and exterior cleaning is a task any household can manage with basic tools and the products described above. A few situations, though, point toward bringing in outside help rather than continuing to clean:
- Persistent mold that returns quickly despite thorough cleaning and drying, which may indicate a slow leak at the base rather than surface-level moisture.
- A toilet that rocks or feels unstable, which often means the wax seal underneath needs replacing, a job that involves removing the toilet entirely and isn't a cleaning fix.
- Water stains on the ceiling below the bathroom, in homes with a bathroom on an upper floor, which points to a leak that needs a plumber's attention rather than more cleaning at the base.
- Soft or damaged flooring around the base, which can mean moisture has already gotten into the subfloor and may require repair beyond what surface cleaning can address.
Catching these situations early and calling a plumber or contractor before they worsen is generally far less costly than waiting until the damage spreads further into the floor or subfloor.
Frequently Asked Questions
What is the best way to clean a toilet base and exterior? Wipe from the tank down to the base using a mild cleaner, clean the floor seam with a small brush, and dry the base thoroughly afterward to prevent moisture buildup.
How often should you clean a toilet base and exterior? A quick wipe weekly and a full base and floor seam clean every two to three weeks works for most households, with a monthly check of the caulk line if one is present.
What cleaning products are safe for a toilet base and exterior? Mild all-purpose bathroom cleaner, diluted vinegar, and baking soda paste are generally safe for porcelain and most exterior surfaces. Avoid frequent vinegar use on chrome or brass hardware, and avoid vinegar entirely on natural stone flooring.
What should you avoid when cleaning a toilet base and exterior? Avoid abrasive scouring pads on painted or plastic parts, mixing bleach with vinegar or ammonia, leaving the floor seam wet after cleaning, and using acidic cleaners on natural stone.
How can you clean a toilet base and exterior without damaging them? Use a soft cloth or sponge rather than abrasive tools, an old toothbrush for the floor seam, choose cleaning products based on your specific flooring material, and avoid scrubbing directly on any caulk line with harsh pressure or abrasive products.
Read the full bathroom cleaning guide for how base and exterior care fits into complete toilet upkeep.
A Quick Safety Note
Toilet base and exterior cleaning sometimes involves vinegar, baking soda, or mild bleach-based products. Never mix bleach with vinegar or ammonia, since this can release hazardous fumes in an enclosed bathroom space. Keep the area ventilated during cleaning, and if mold, persistent moisture, or a soft floor around the base doesn't resolve with regular cleaning, it may point to a seal or plumbing issue that's worth having checked by a professional.

Leave a Reply