
If your dishes are coming out with food bits still stuck on them, or the top rack never seems to get quite as clean as the bottom, a clogged spray arm is often the reason why. The spray arm is the rotating piece with small holes that shoots water onto your dishes during each cycle, and those holes are exactly the right size to trap food particles, grease, and mineral deposits from hard water. Dishwasher spray arm cleaning is a task most people never think about until cleaning performance drops off, but it's a simple fix once you know where to look and what to do. This guide is part of the Dishwasher Cleaning Guide, and it covers how to remove the spray arm, clear clogged holes, and figure out how often this maintenance is actually needed.
The Best Way to Clean a Dishwasher Spray Arm
Remove the spray arm (most simply lift or unclip out) and rinse it under running water to knock loose any surface debris. Use a toothpick or thin wire to clear out any holes that look blocked, checking each one from both directions since debris sometimes lodges partway through. Soak the arm in warm water with a splash of white vinegar for 15 to 20 minutes if mineral buildup is visible, then scrub gently with a soft brush before rinsing and reinstalling. Spin the arm by hand once it's back in place to confirm it rotates freely before running a cycle.
The sections below walk through this process step by step, cover both the upper and lower spray arms, and explain which products handle grease versus mineral buildup.
Why Spray Arm Holes Get Clogged
The spray arm relies on water pressure pushing through small, precisely sized holes to create the spinning motion that distributes water across your dishes. Food particles that slip past the filter, grease residue, and mineral deposits from hard water all tend to settle into these holes over time, gradually reducing water flow through some or all of them. Once enough holes are blocked, the arm doesn't spin as evenly, water pressure drops, and dishes on the far side of the rack stop getting properly rinsed.
Hard water areas see this happen faster, since mineral deposits build up inside the holes even without much food debris involved. Kitchens that run the dishwasher with a lot of greasy pots and pans also see faster clogging, since grease tends to harden inside the holes rather than rinsing away completely on its own.
Step-by-Step Cleaning Process
- Turn off and unplug the dishwasher, or make sure it's fully powered down, before removing any parts.
- Locate and remove the spray arm. Most dishwashers have both an upper and lower spray arm, and each typically lifts off or unclips with a simple twist or pull. Check your manual if the release mechanism isn't obvious.
- Rinse the arm under running water to knock loose any loose debris sitting on the surface or partially in the holes.
- Inspect each hole for blockages. Hold the arm up to the light if needed to see which holes look clogged or restricted.
- Clear blocked holes with a toothpick or a thin piece of wire, working from both ends of each hole since debris can lodge partway through rather than sitting right at the opening.
- Soak the arm in warm water with a splash of white vinegar for 15 to 20 minutes if you notice a chalky or crusty buildup, which usually points to mineral deposits from hard water.
- Scrub gently with a soft brush after soaking, paying attention to the areas around each hole.
- Rinse thoroughly to remove any loosened debris or vinegar residue.
- Reinstall the spray arm and spin it by hand to confirm it rotates freely before closing the dishwasher and running a cycle.
This process typically takes 20 to 30 minutes, most of that being the vinegar soak if mineral buildup is present.
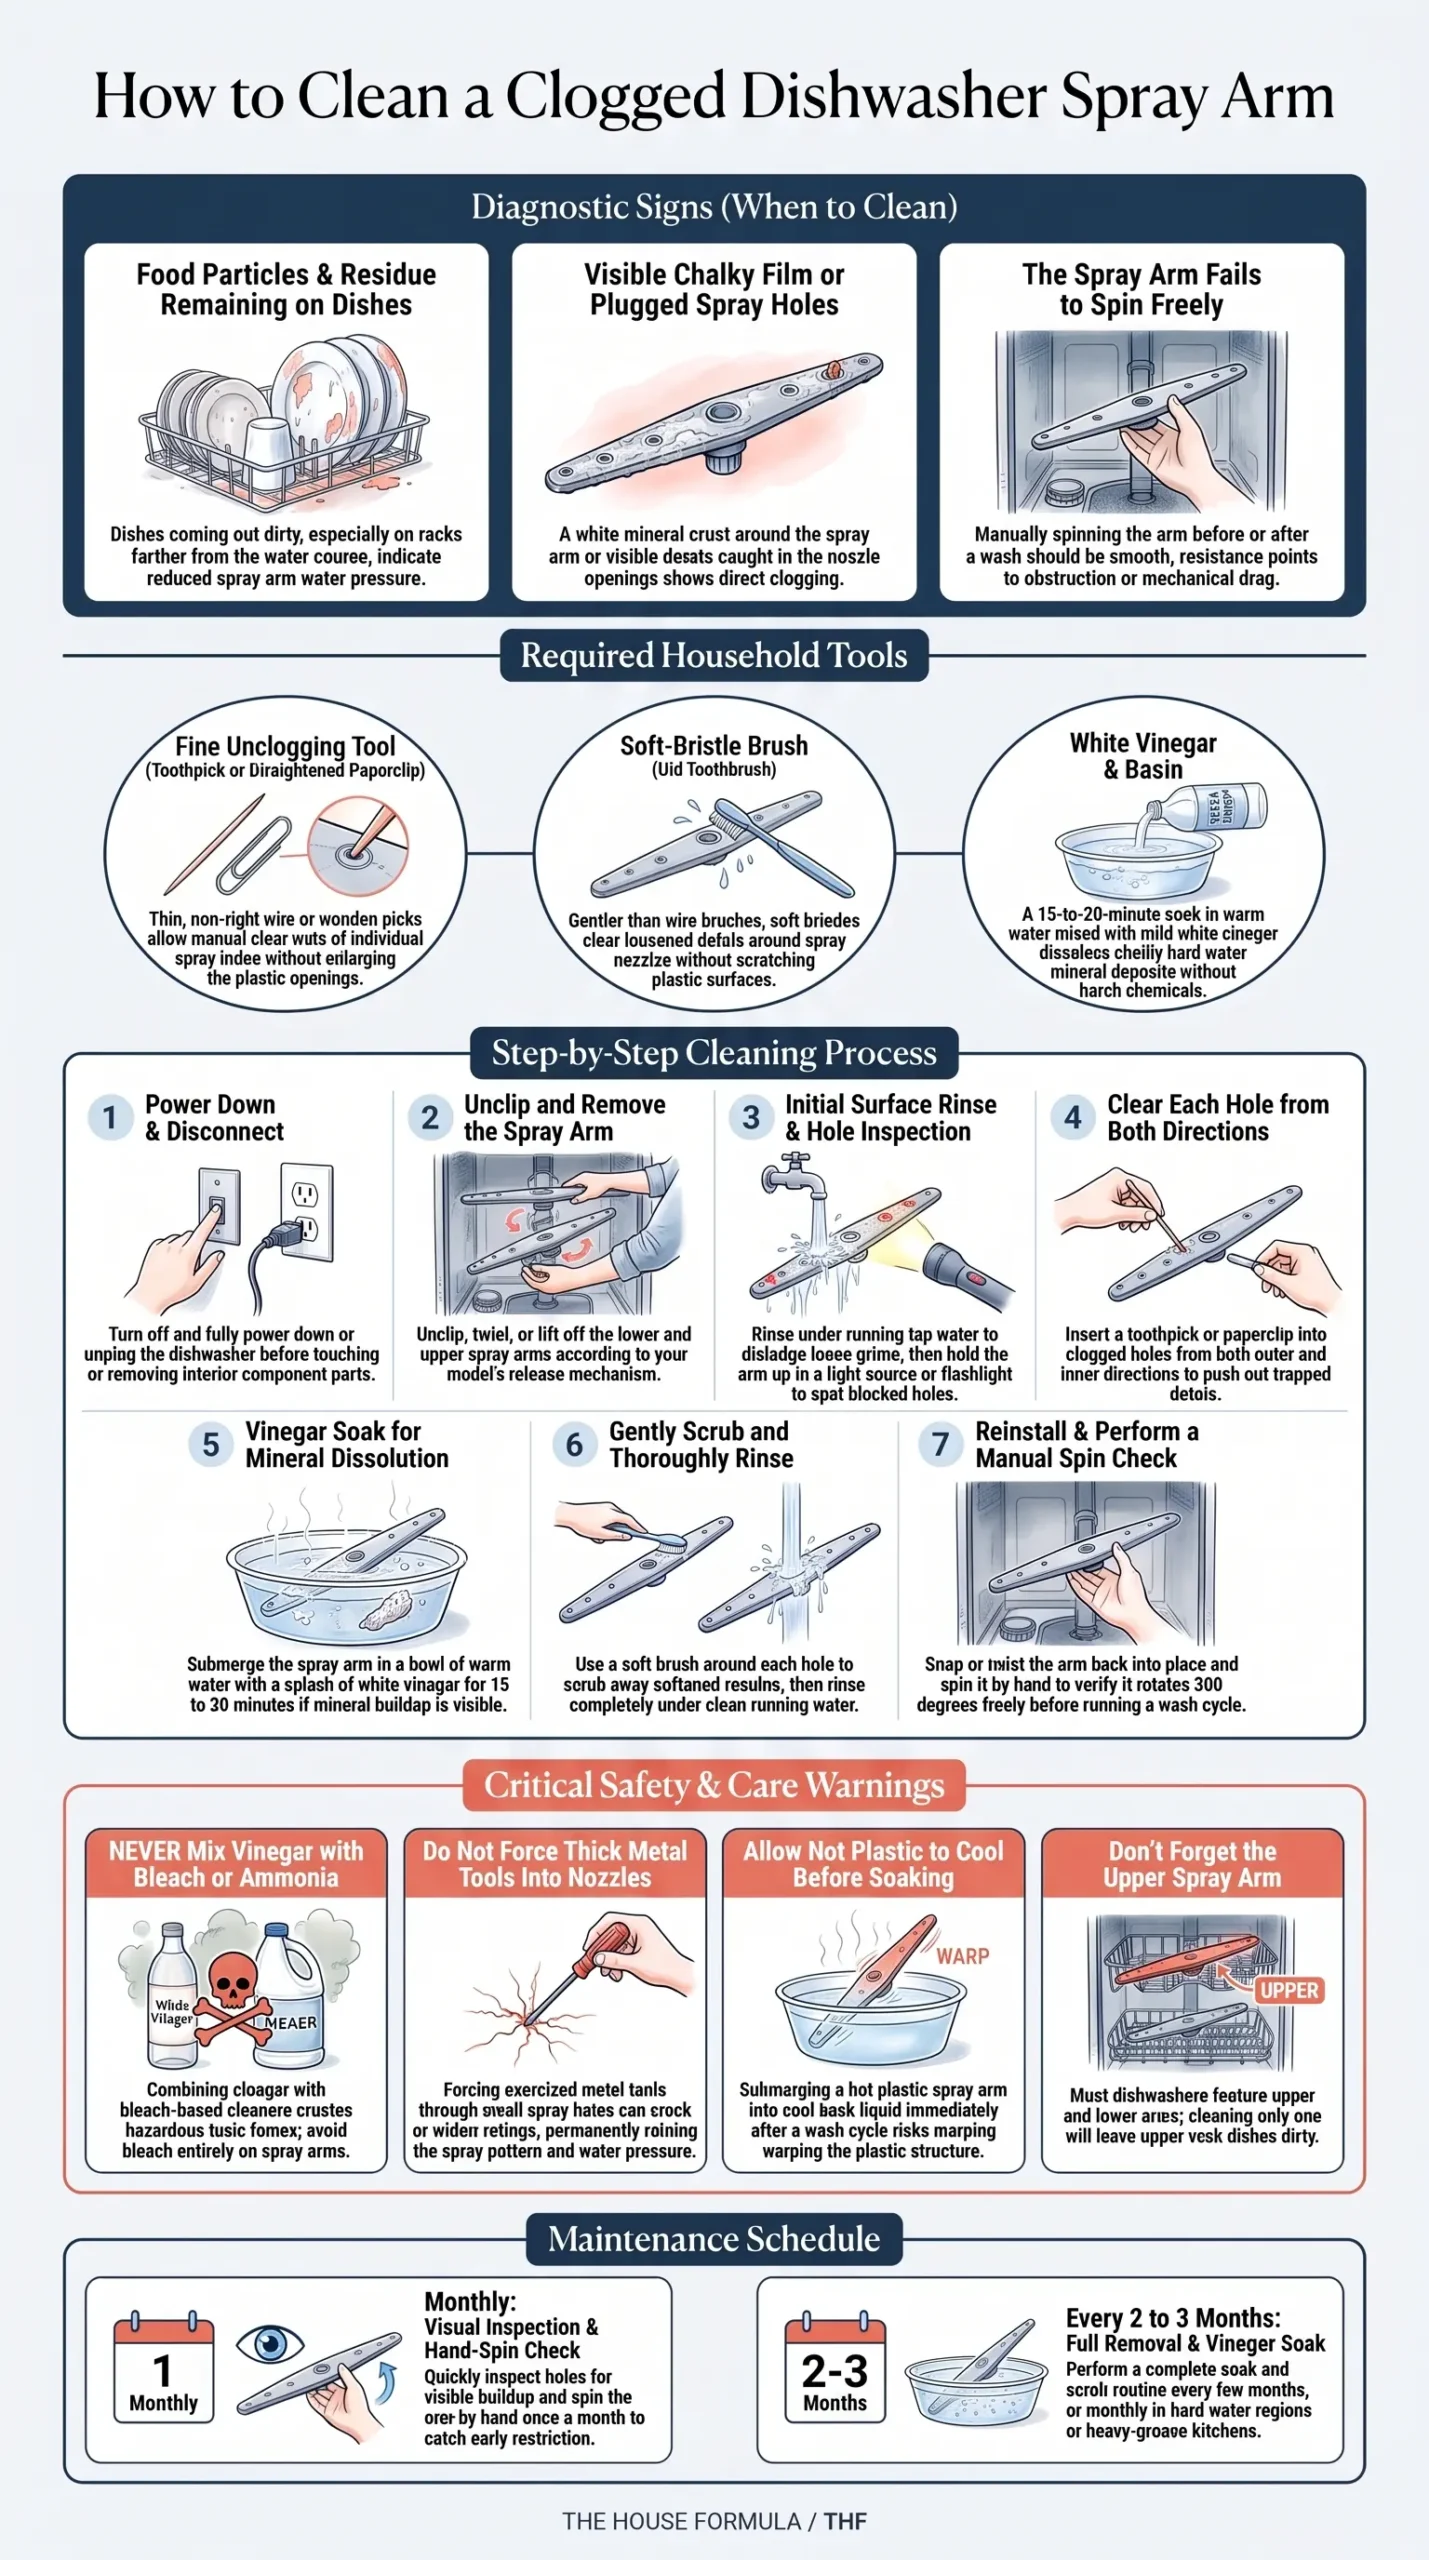
Photo Credit: Hobby Guidebook Editorial
How to Tell If Your Dishwasher Spray Arm Needs Cleaning
A few signs point to a spray arm that needs attention.
- Dishes coming out with visible food residue, particularly on the rack farther from the water source
- Uneven cleaning results, where some dishes come out spotless and others still have grime
- The spray arm not spinning freely when you check it by hand before or after a cycle
- Visible debris or a chalky white residue in or around the holes when you inspect the arm directly
- A cloudy film on glassware that persists even after a full cycle, which can point to both clogged holes and separate hard water issues
If you're noticing any of these, pulling the spray arm out for a quick inspection takes just a couple of minutes and often reveals the problem right away.
Tools Needed for Dishwasher Spray Arm Cleaning
This task requires only a few simple household items.
- A toothpick or thin wire (a straightened paperclip works well) for clearing individual holes
- A soft-bristle brush, such as an old toothbrush, for scrubbing without scratching the plastic
- A basin or bowl for soaking the arm in vinegar and water
- White vinegar for dissolving mineral deposits
- A flashlight, helpful for spotting which holes are actually blocked
No specialty tools or dishwasher-specific products are needed for routine cleaning, which makes this an easy task to keep up with regularly.
What Cleaning Products Are Safe for a Dishwasher Spray Arm?
A short list of products covers nearly everything this task requires.
- Warm water: sufficient on its own for rinsing loose debris
- White vinegar: effective for dissolving mineral and limescale buildup inside the holes, used as a soak rather than a spray
- Mild dish soap: helpful for cutting through greasy residue if that's the main issue rather than mineral deposits
- A soft-bristle brush: gentle enough to clean around holes without widening or damaging them
Avoid using metal tools that are too thick or rigid to clear holes, since forcing something too large through a small opening can widen or crack it. Avoid bleach-based cleaners on the spray arm, since bleach isn't necessary for this task and combining it with vinegar produces hazardous fumes. Never mix vinegar with bleach or ammonia-based products for this or any other cleaning task in the kitchen.
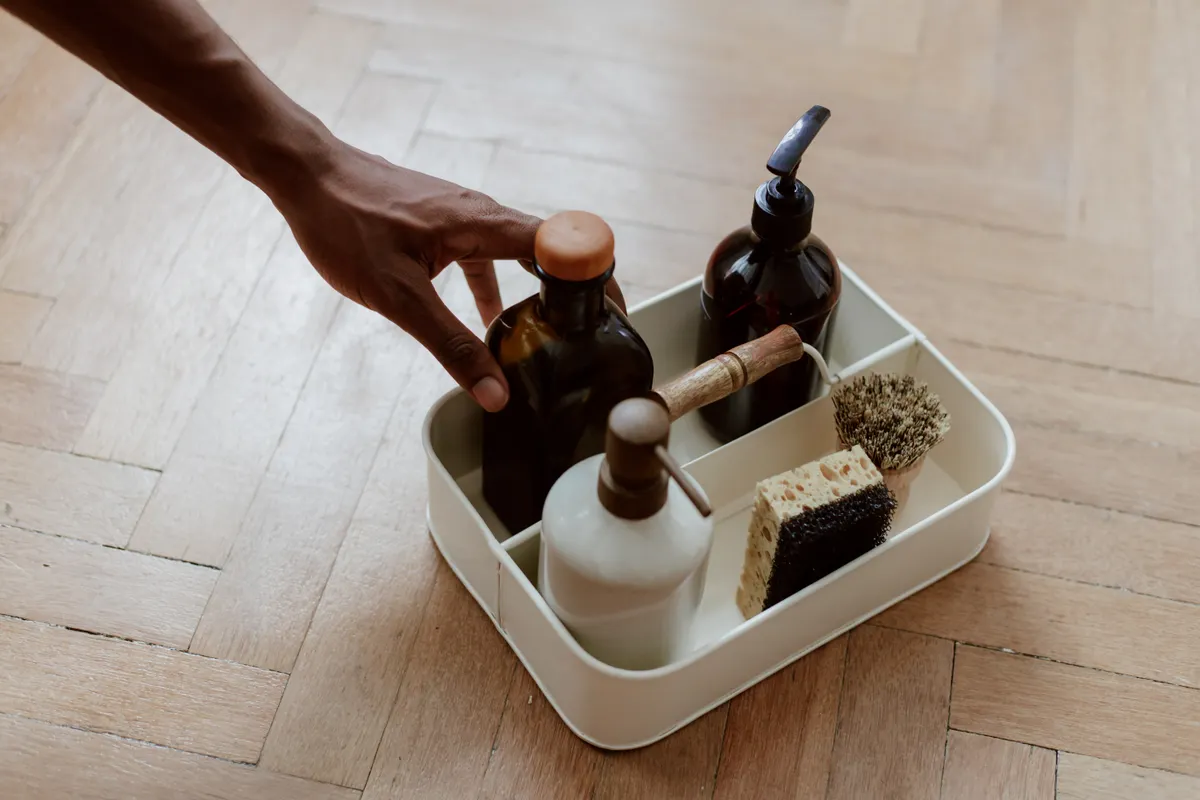
Photo Credit: Ron Lach
Eco-Friendly Way to Clean a Dishwasher Spray Arm
White vinegar is already one of the more eco-friendly options available for this task, since it's a mild, biodegradable acid that handles mineral buildup without needing a stronger commercial descaler. For grease-related clogs rather than mineral ones, plain warm water and a small amount of dish soap generally do the job without needing anything else added. A toothpick or an old toothbrush, rather than a single-use cleaning tool, keeps this task low-waste as well, since both are items most households already have on hand. For anyone trying to minimize chemical use around dishwasher maintenance generally, vinegar and dish soap cover the vast majority of spray arm cleaning needs without requiring a separate purchase.
What to Avoid When Cleaning a Dishwasher Spray Arm
A few habits tend to cause more problems than they solve.
- Forcing a toothpick or wire that's too thick through a hole: this can crack or widen the hole, which affects water pressure and spray pattern going forward
- Skipping the hand-spin check before running a cycle: confirming the arm rotates freely catches reassembly issues before you run a full wash
- Using bleach on the spray arm: unnecessary for this task, and combining it with vinegar produces hazardous fumes
- Ignoring the upper spray arm if your dishwasher has one: both arms can clog, and cleaning only one won't fully resolve uneven washing
- Soaking the arm in hot water immediately after a cycle: letting it cool first avoids any risk of warping certain plastics with a sudden temperature change
How Often Should You Clean a Dishwasher Spray Arm?
A quick visual check and hand-spin test every month helps catch early signs of clogging before it affects wash performance. A full removal and soak-and-scrub cleaning works well every two to three months for most households, though homes with hard water or frequent greasy cookware may find monthly cleaning keeps things running better. Checking the spray arm whenever you notice dishes coming out less clean than usual is a reasonable habit regardless of the regular schedule.
Photo Credit: Wendelin Jacober
Related Dishwasher Parts Worth Checking
A clogged spray arm often isn't the only spot where buildup collects inside a dishwasher. The rubber gasket around the door can trap food residue and moisture in a way that affects both cleaning performance and odor, and it benefits from its own separate cleaning approach. The Dishwasher Door Seal & Gasket Cleaning guide covers that process in detail, including how to reach into the folds of the gasket without damaging it.
If the spray arm cleaning revealed heavy mineral deposits, that's often a sign the rest of the dishwasher's interior has some hard water buildup as well, particularly around the heating element and interior walls. The Removing Hard Water & Limescale Buildup in a Dishwasher guide walks through a full descaling process for that broader issue, which pairs naturally with spray arm maintenance since both stem from the same water quality factor.
Frequently Asked Questions
What is the best way to clean a dishwasher spray arm? Remove the arm, rinse it, clear blocked holes with a toothpick or thin wire, soak in warm water with vinegar if mineral buildup is present, then scrub, rinse, and reinstall.
How often should you clean a dishwasher spray arm? Do a quick check monthly, and a full soak-and-scrub cleaning every two to three months, more often in hard water areas or with frequent greasy cookware.
What cleaning products are safe for a dishwasher spray arm? Warm water, white vinegar for mineral deposits, and mild dish soap for grease. Avoid bleach-based cleaners and never mix vinegar with bleach or ammonia.
What should you avoid when cleaning a dishwasher spray arm? Avoid forcing thick tools through the holes, skipping the hand-spin check before running a cycle, and neglecting the upper spray arm if your dishwasher has one.
How can you clean a dishwasher spray arm without damaging it? Use a toothpick or thin wire sized to the hole, a soft brush rather than anything abrasive, and let the arm cool before soaking if it's just come out of a hot cycle.
A Quick Note on Safety
Turn off and unplug the dishwasher before removing the spray arm or any other interior parts. Never mix vinegar with bleach or ammonia-based products, since this produces hazardous fumes. If dishes continue coming out poorly cleaned even after a thorough spray arm cleaning, that may point to a water pressure or heating element issue worth having checked by a qualified appliance technician.
For more on keeping the rest of your kitchen clean, browse the complete kitchen cleaning guide.





Leave a Reply