

A finished kitchen renovation leaves behind more than sawdust. Drywall dust, adhesive residue, grout haze, and construction grime settle into every corner, including places you wouldn't normally think to check. This guide is part of Kitchen Cleaning for Special Situations, and it walks through a safe, practical order for cleaning a kitchen after renovation work, without scratching new surfaces or spreading dust further than it already has.
What to Do First After a Kitchen Renovation
Before touching a single surface, the first move is simple:
- Ventilate the room by opening windows or running an exhaust fan.
- Let heavy dust settle for a few hours before cleaning anything.
- Remove loose debris and dry dust with a vacuum before using any water or cleaner.
Skipping straight to wiping surfaces with a wet cloth is one of the most common mistakes after a renovation, and it usually makes the job harder, not easier.
How Post-Renovation Cleaning Differs From a Normal Routine
Regular kitchen cleaning deals with grease, food residue, and everyday grime. Post-renovation cleaning deals with something different: fine construction dust, leftover adhesive, grout haze on new tile, and sometimes protective film still stuck to appliances or cabinet fronts.
That difference changes the approach in a few key ways. Dust from drywall sanding is much finer than typical kitchen dust, and it clings to greasy or slightly damp surfaces almost instantly. New surfaces like fresh countertops, painted cabinets, or newly grouted tile may also need time to cure before they can handle stronger cleaning products, so checking with the installer or the product manual matters more here than it would during a normal cleaning day.
Step 1: Let the Dust Settle Before You Start
Construction dust doesn't fall all at once. Sanding, cutting, and installation work can keep fine particles floating in the air for hours after the work stops. Running the kitchen exhaust fan and opening a window, if weather allows, helps clear the air faster. Avoid turning on central heating or air conditioning right away, since forced air can pull settled dust back into circulation and spread it into other rooms.
Give the space at least a few hours, and ideally overnight, before starting the actual cleaning. This isn't just about comfort. Cleaning too soon means constantly re-dusting surfaces you already wiped, which wastes time and product.
Step 2: Remove Dry Dust Before Any Wet Cleaning
This step matters more than almost any other on this list. Wiping a dusty surface with a damp cloth before removing the loose dust turns fine particles into a gritty paste. That paste is harder to remove and can leave faint scratches on softer surfaces like laminate countertops, painted cabinets, or brushed metal appliance finishes.
Instead, work in this order:
- Use a vacuum with a brush attachment on cabinet tops, open shelving, and any horizontal surface.
- Wipe with a dry microfiber cloth on smaller areas where a vacuum isn't practical.
- Shake out or vacuum any cloth or paper towel before it gets reused, since dust builds up fast.
- Only move to a damp cloth once the bulk of loose dust is gone.
This dry-first approach is the safest way to avoid scratching new surfaces while still getting them fully clean.
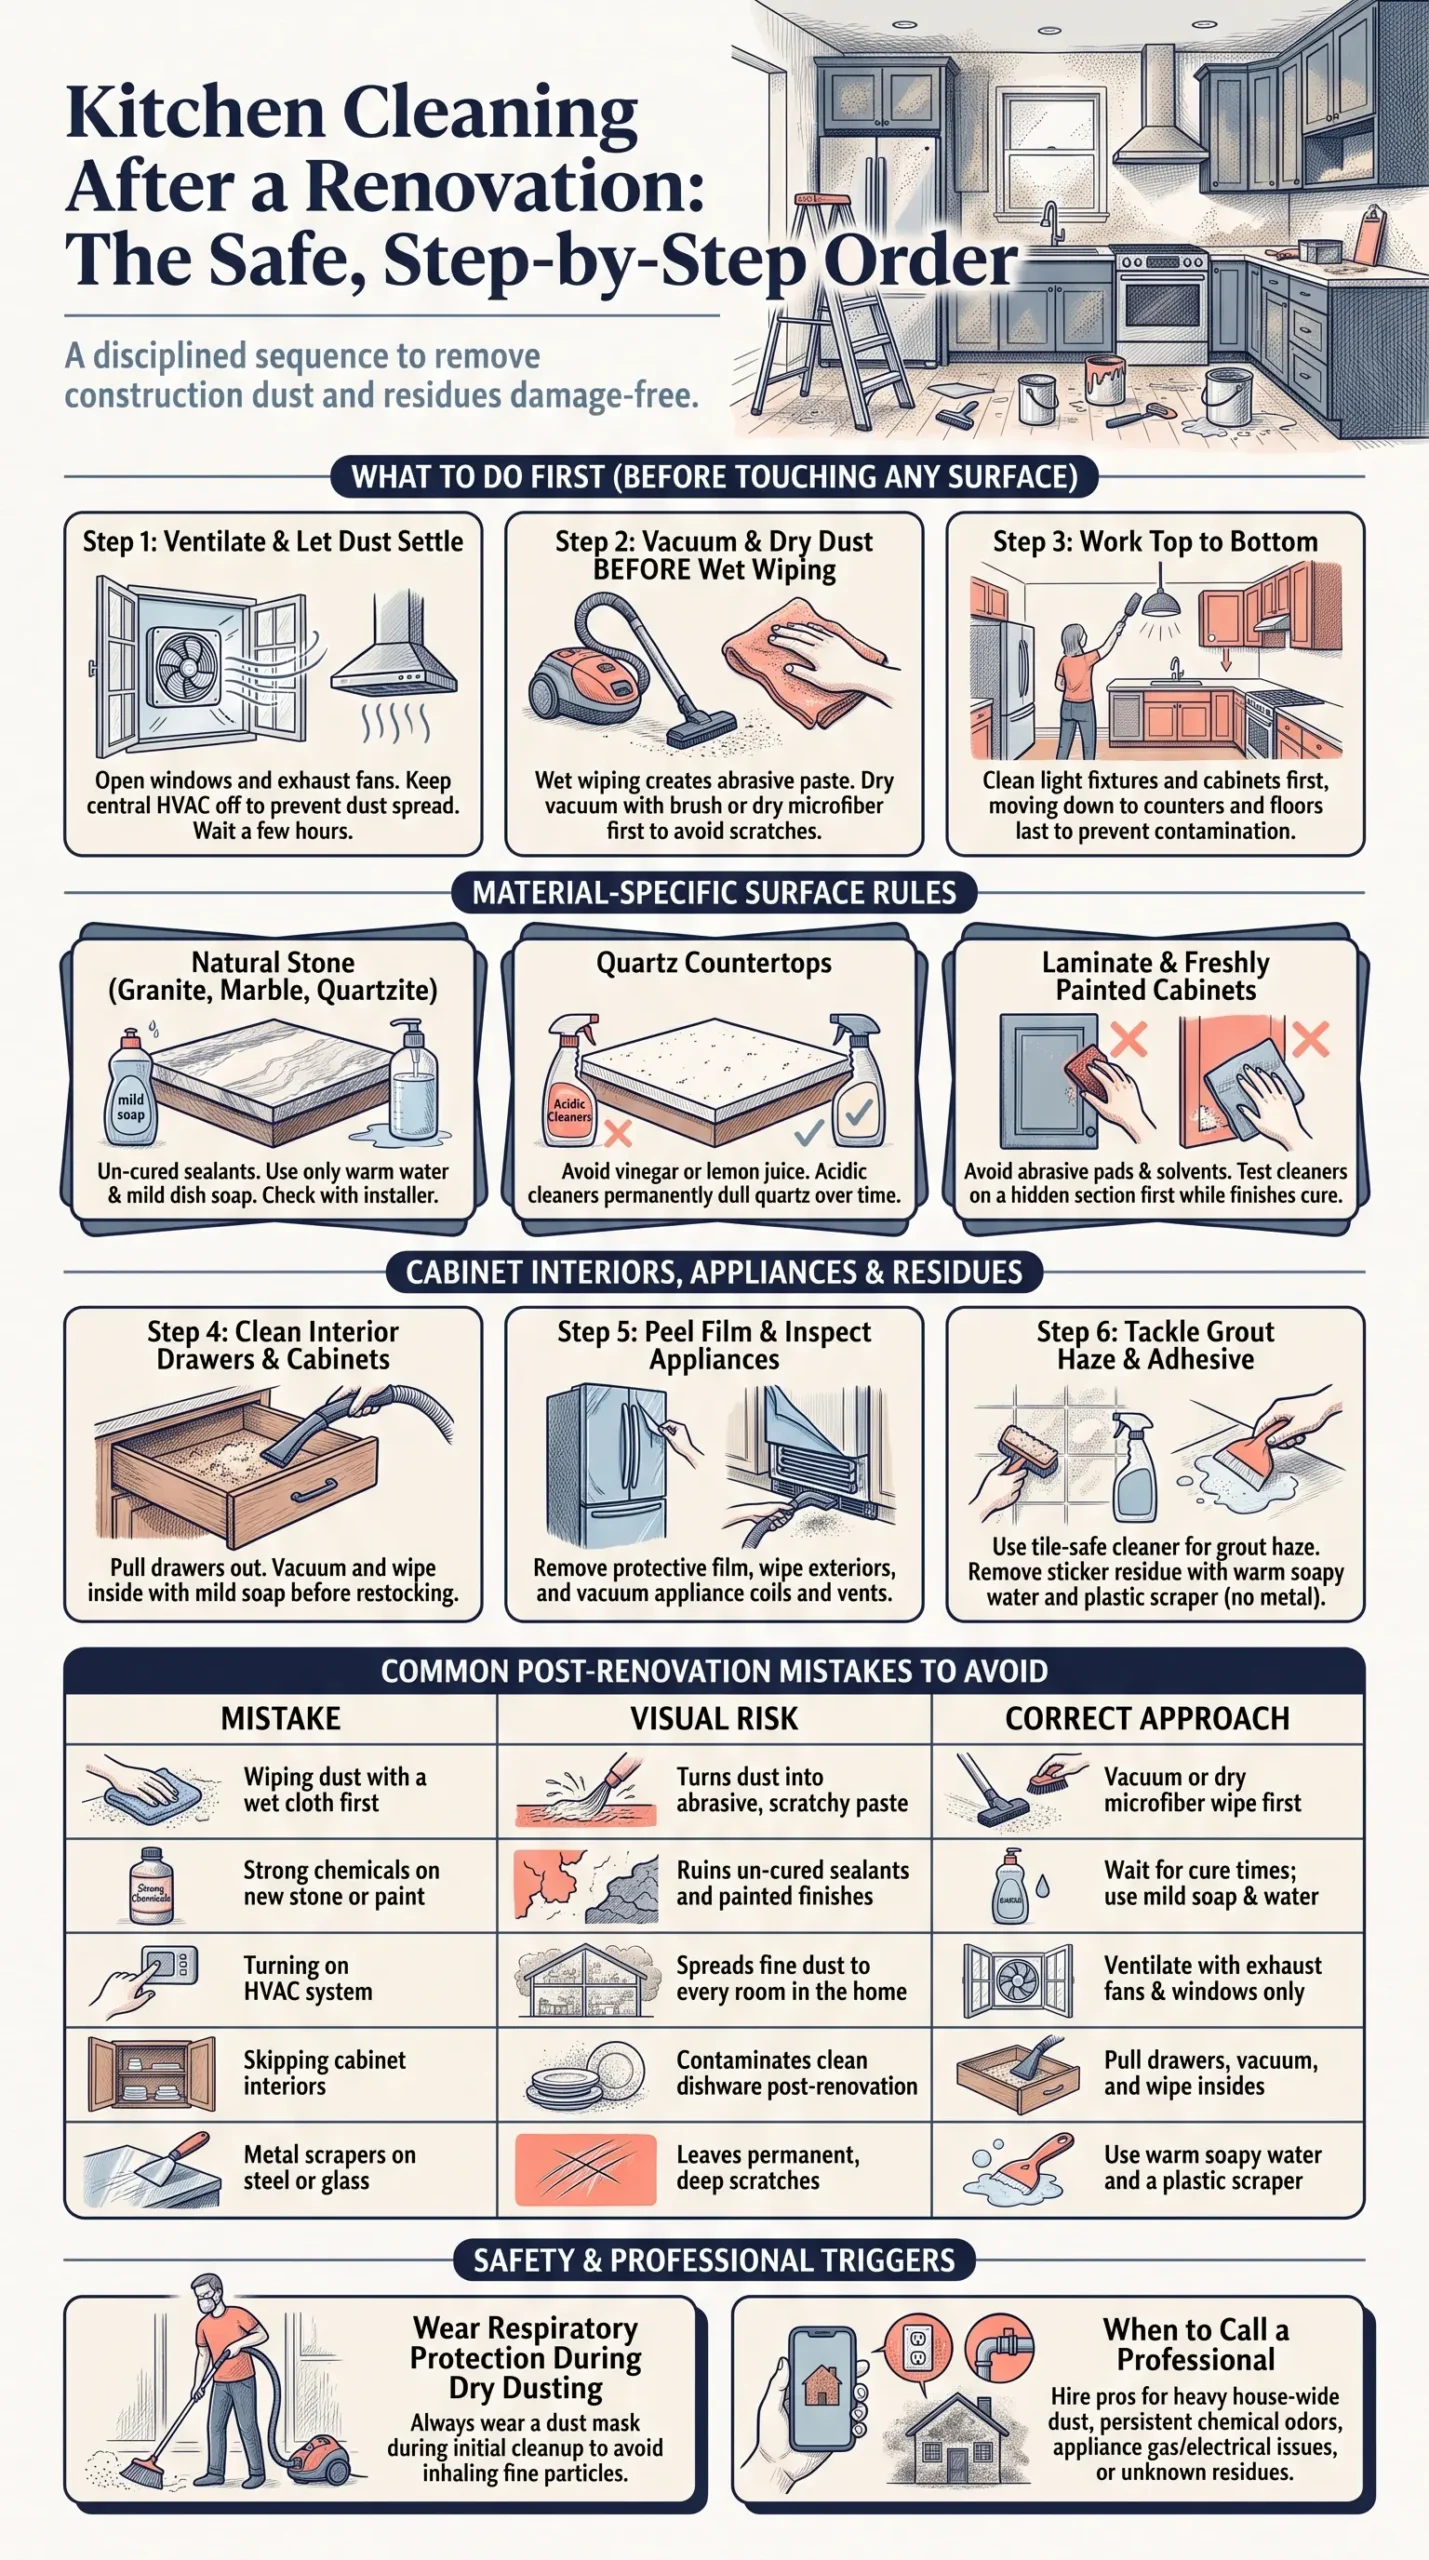
Photo Credit: Hobby Guidebook Editorial
Step 3: Clean From Top to Bottom
Dust and debris always settle downward, so cleaning in the wrong order means redoing work. Start with the highest surfaces in the kitchen, like the top of cabinets, light fixtures, and range hood exteriors. Move down to countertops and cabinet fronts next, then finish with floors last.
This order avoids knocking dust from a high shelf onto a countertop you already cleaned. It also means floors, which usually need the most work anyway, get the final pass once everything above them is done.
Step 4: Clean New Countertops and Cabinets the Right Way
New countertops and cabinets are the easiest things to damage during post-renovation cleanup, mostly because people assume a stronger cleaner works faster. That's not always true, and it can backfire.
A few material-specific notes worth knowing:
- Natural stone countertops (granite, marble, quartzite) are often sealed after installation, and that sealant may need time to cure. Ask the installer how long to wait before using any cleaner beyond warm water and mild dish soap.
- Quartz countertops are generally low-maintenance but shouldn't be cleaned with strong acids like straight vinegar or lemon juice, since these can dull the surface over time.
- Laminate countertops can scratch with abrasive pads or powders, so a soft cloth and mild cleaner is the safer choice.
- Painted or newly finished cabinets can be sensitive to strong solvents while the finish is still curing, so a gentle approach is safest for the first few weeks.
Always test a new or unfamiliar cleaner on a small, hidden section first, whether that's the underside of a countertop or the inside edge of a cabinet door. This matters even more right after installation, since the true durability of a new finish isn't always obvious yet.
If you're unsure which cleaner is safe for a specific new surface, checking the Kitchen Surface Material Cleaning Compatibility Chart before reaching for a random bottle under the sink can prevent an avoidable mistake.
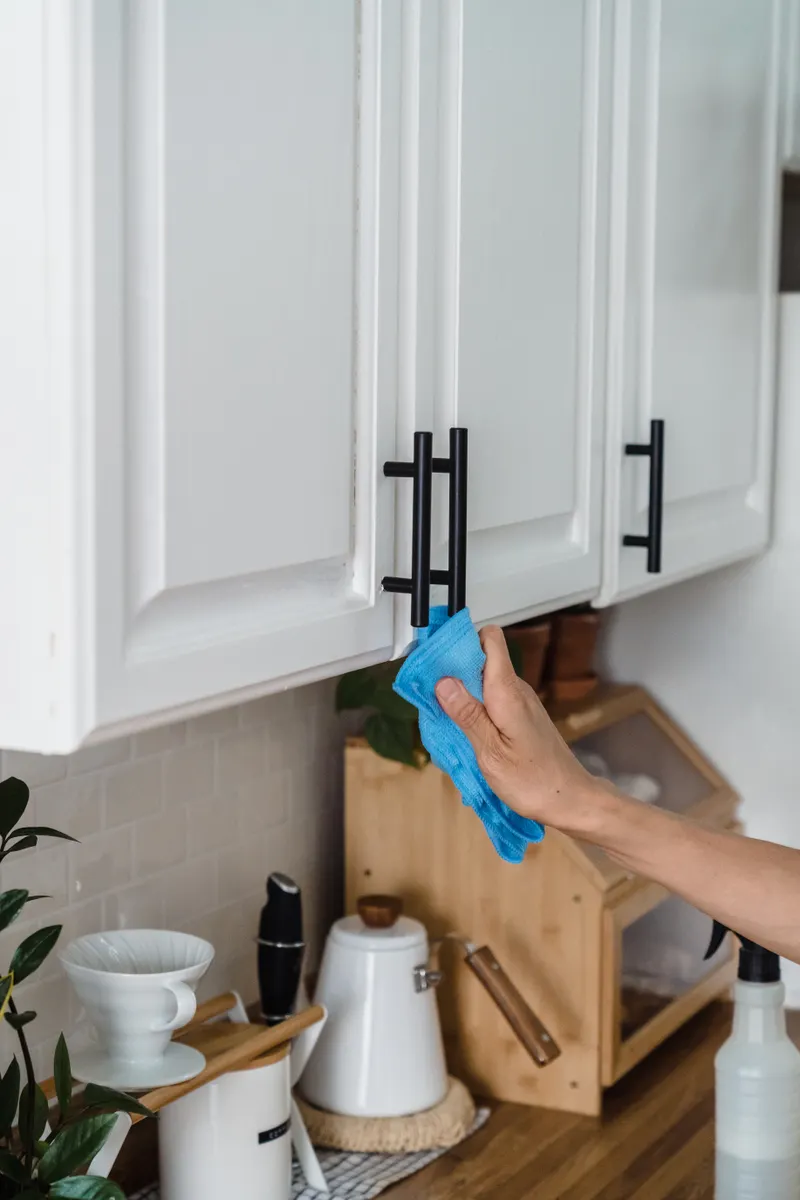
Photo Credit: Liliana Drew
Step 5: Clean Inside Cabinets, Drawers, and Appliances
It's tempting to skip straight to restocking cabinets once the outside looks clean, but dust gets inside drawers and cabinets even when the doors are closed, especially during heavy sanding work. Pull drawers out fully if possible, vacuum the inside, then wipe with a cloth and a small amount of mild dish soap in warm water.
Appliances need the same attention. Check for leftover protective film on refrigerator doors, dishwasher panels, or range surfaces, since installers sometimes leave it in place during the final stages of work. Wipe down appliance exteriors, and check vents and coils on the back or bottom of the refrigerator, where dust tends to collect during nearby construction work.
If the correct dilution for a specific cleaner isn't clear from the label, the Kitchen Cleaning Product Dilution Ratio Chart covers common dilution ratios so you're not guessing with a new bottle right after a renovation.
Step 6: Address Grout Haze, Adhesive Residue, and Stickers
New backsplash tile often has a cloudy film left behind from grout installation, sometimes called grout haze. Plain water alone often isn't enough to remove it. A mild, tile-safe cleaner recommended by the installer usually works, but check first whether the tile is natural stone, since some acidic cleaners that work fine on ceramic or porcelain can etch or dull natural stone.
Adhesive residue from protective film, price stickers, or installation tape can usually be softened with warm, soapy water and a plastic scraper rather than a metal one, which can scratch finished surfaces. Avoid using sharp blades on stainless steel or glass appliance fronts unless the manufacturer specifically confirms it's safe.
Common Mistakes to Avoid After a Renovation
A few patterns show up again and again in post-renovation cleanups:
|
Mistake |
Why It's a Problem |
Better Approach |
|
Wiping dust with a wet cloth first |
Turns fine dust into a gritty paste that can scratch surfaces |
Vacuum or dry-wipe first, then go wet |
|
Using strong chemicals on new stone or paint right away |
Sealants and finishes may still be curing |
Check curing time with the installer first |
|
Turning on HVAC before dust settles |
Spreads dust into other rooms |
Ventilate manually and wait before using forced air |
|
Skipping the inside of cabinets and drawers |
Dust settles inside even with doors closed |
Pull drawers, vacuum, then wipe |
|
Using metal scrapers on stainless steel or glass |
Can leave permanent scratches |
Use a plastic scraper or soft cloth instead |
When Professional Help Makes Sense
Most post-renovation kitchen cleaning is manageable without outside help, but a few situations call for a professional instead:
- Heavy dust throughout the whole home, not just the kitchen, which often needs a specialized post-construction cleaning service with commercial-grade equipment.
- Lingering chemical odors from paint, adhesives, or sealants that don't fade after a few days of ventilation, since prolonged exposure to strong fumes isn't something to push through.
- Appliance installation issues, like a dishwasher or range that seems improperly connected, which involves electrical or gas work best left to a licensed technician.
- Unknown residue you can't identify, especially near electrical outlets or gas lines, where guessing at a cleaning method could be unsafe.
If the renovation followed damage from something like a pest problem, the cleanup priorities shift toward sanitizing food-contact areas rather than just dust removal, which is covered separately in Kitchen Cleaning After a Pest Infestation. Renovations that follow fire damage carry their own separate concerns around soot and smoke residue, detailed in Cleaning a Kitchen After a Grease Fire.

Photo Credit: RDNE Stock project
After the Deep Clean: Reorganizing the Kitchen
Once the dust is gone and every surface has been wiped down properly, the next natural step is putting the kitchen back together in a way that actually works for the new layout. A renovation often changes where cabinets, drawers, or appliances sit, which is a good opportunity to rethink storage rather than just putting everything back where it used to be. Reorganizing After a Kitchen Renovation covers that process in more detail once the cleaning itself is finished.
Frequently Asked Questions
What should you do first when dealing with the kitchen in this situation? Ventilate the space, let heavy dust settle for a few hours, and remove loose dust with a vacuum before using any wet cleaning method.
How does the normal approach to the kitchen change in this situation? Cleaning shifts from a food-and-grease focus to a dust-and-residue focus, with extra care around new surfaces that may still be curing and need gentler products at first.
What mistakes should you avoid with the kitchen in this situation? Avoid wiping dust with a wet cloth before vacuuming, using strong chemicals on new stone or paint too soon, and skipping the inside of cabinets and drawers.
When is professional help appropriate for the kitchen? Call a professional for whole-home dust beyond the kitchen, lingering chemical odors, appliance installation issues, or unknown residue near electrical or gas connections.
What common mistakes should you avoid with the kitchen? The biggest ones are cleaning top to bottom out of order, using metal scrapers on stainless steel or glass, and restocking cabinets before checking that the interiors are actually clean.
A Quick Safety Note
Renovation dust can include fine particles from drywall, wood, or paint, so a dust mask is a reasonable precaution during the initial dry cleanup, especially for anyone with respiratory sensitivities. Always check manufacturer instructions before using a new cleaning product on a freshly installed surface, and never mix cleaning chemicals unless the combination is specifically confirmed safe. Keep the space ventilated while using any cleaner with a strong odor, and if a lingering smell, unknown stain, or appliance issue doesn't resolve with normal cleaning, a qualified professional is the safer next step.
Explore the complete kitchen cleaning guide for more room-specific routines and troubleshooting help.




Leave a Reply