
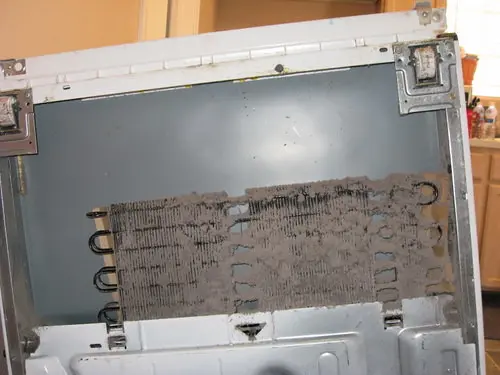
Refrigerator coils rarely cross a homeowner's mind until the appliance starts running louder than usual or seems to work harder to keep food cold. These coils, usually tucked behind a bottom kickplate or along the back of the unit, release heat as part of the cooling cycle, and when they're coated in dust and pet hair, that heat has a harder time escaping. Refrigerator coil cleaning is one of those overlooked maintenance tasks that directly affects how efficiently the appliance runs, and it's simple enough to handle without any special tools. This guide is part of the Refrigerator Cleaning Guide, and it covers where to find your coils, how to clean them safely, and how often this task actually needs attention.
The Best Way to Clean Refrigerator Coils
Unplug the refrigerator first, then locate the coils, either behind a bottom front grille or along the back of the unit, depending on the model. Use a coil brush or a vacuum with a narrow attachment to remove dust, lint, and pet hair built up along the coils and the surrounding area. Work gently to avoid bending the thin metal fins, and vacuum any loose debris that falls to the floor before plugging the refrigerator back in. This entire process typically takes 15 to 20 minutes and requires no cleaning chemicals at all.
That covers the core process. The sections below explain how to find your specific coil location, what tools work best, and how coil buildup connects to the appliance's overall performance.
Why Refrigerator Coils Need Cleaning
Condenser coils release heat that's removed from inside the refrigerator during the cooling cycle. When dust, pet hair, and general household debris coat the coils, that heat has a harder time dissipating, which can make the compressor work longer and harder to reach the same cooling result. Over time, this added strain may affect energy use and, in some cases, shorten the appliance's working life.
This isn't a task that needs to happen often, but it also isn't one to skip entirely, especially in homes with pets, since pet hair tends to accumulate on coils faster than general household dust. A refrigerator that seems to run louder than it used to, or that feels warm to the touch along the sides or back, can sometimes be showing early signs that the coils need attention.
Finding Your Refrigerator's Coils
Coil location varies by refrigerator design, and knowing which type you have determines how you'll access them.
- Bottom-front coils: Common in newer refrigerators, these sit behind a removable grille or kickplate along the bottom front of the unit, often just below the doors. This grille typically snaps or pulls off by hand, sometimes with a gentle tug at the bottom corners.
- Back-mounted coils: Common in older refrigerator models, these run along the exterior back panel and require pulling the refrigerator away from the wall to access.
If you're not sure which type your refrigerator has, checking the bottom front for a removable grille panel is the quickest way to confirm. If there's no grille there, the coils are almost certainly mounted on the back, and the owner's manual, often available through the manufacturer's website using your model number, can confirm the exact layout if needed.
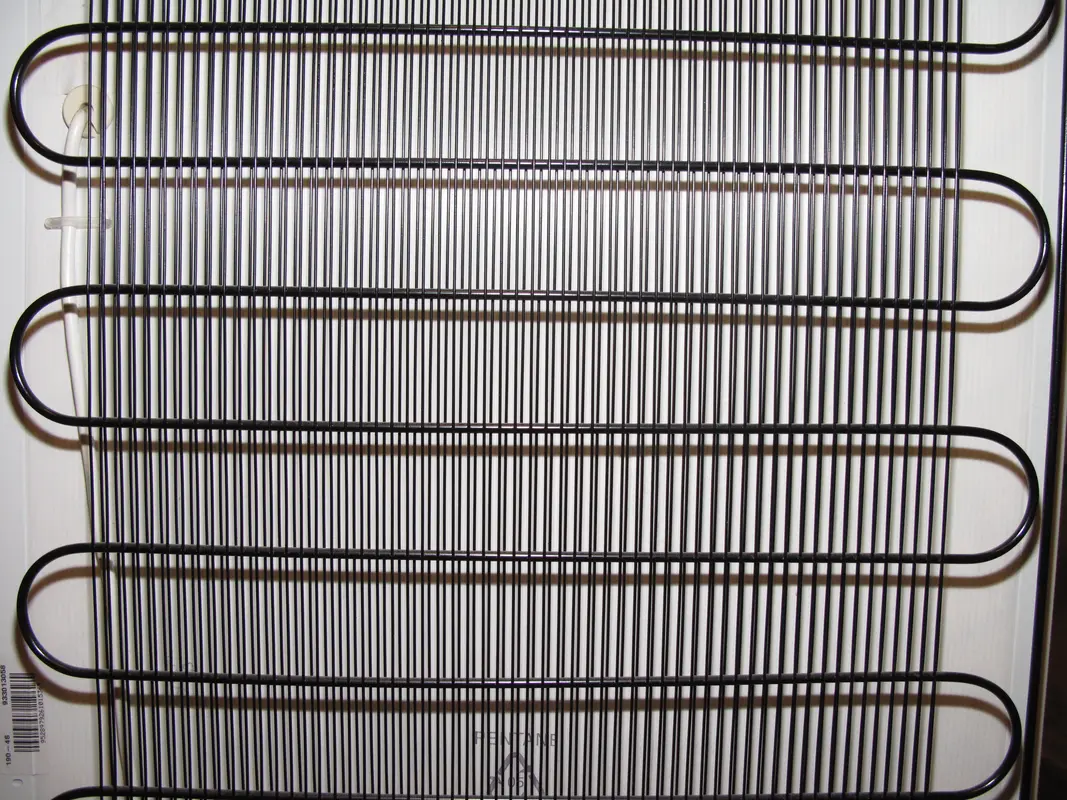
Photo Credit: Internet
Step-by-Step Coil Cleaning Process
- Unplug the refrigerator before starting any cleaning. This is a necessary safety step, since working around coils and electrical components while the unit is powered on creates unnecessary risk.
- Locate and remove the grille panel if your coils are bottom-mounted, or carefully pull the refrigerator away from the wall if they're back-mounted. Ask for help moving the unit if it feels too heavy to manage alone, since refrigerators are awkward and can be harder to maneuver than they look.
- Vacuum the loose dust and debris first, using a vacuum with a narrow crevice attachment or a brush attachment. This removes the bulk of the buildup before more detailed cleaning.
- Use a coil brush (a long, narrow brush designed specifically for this task, often sold at hardware stores) to reach between the coil fins and dislodge compacted dust or pet hair that the vacuum couldn't fully remove.
- Vacuum again after brushing to pick up the debris that's now loosened and fallen to the floor or gathered at the base of the unit.
- Check the fan, if visible, for dust buildup as well, since this component works alongside the coils and can also affect cooling efficiency if it's coated in debris.
- Replace the grille panel or push the refrigerator back into place, then plug it back in.
Work gently throughout this process, since the metal fins on the coils are thin and can bend fairly easily under too much pressure. A bent fin isn't necessarily a serious problem, but a significant number of bent fins can reduce how effectively the coil sheds heat, so a light touch works better than forceful scrubbing.
Vacuuming vs Brushing: Which Tool Works Best
Both tools serve a purpose, and using them together typically gives the most thorough result. The vacuum handles loose dust efficiently and reaches into open areas quickly, while a coil brush gets into the tighter spaces between fins where compacted debris tends to sit. For a closer comparison of when to reach for one over the other, and how to use each without damaging the coil fins, the Vacuuming vs Brushing Refrigerator Coils guide breaks down the specifics in more detail than general coil cleaning needs to cover here.
What Cleaning Products Are Safe for Refrigerator Coils?
Refrigerator coil cleaning is one of the few kitchen appliance tasks that generally doesn't need any liquid cleaning product at all. Dust and pet hair respond well to dry cleaning tools rather than moisture, and introducing liquid near electrical components adds unnecessary risk.
- Vacuum with a crevice or brush attachment: the primary tool for lifting loose dust and debris
- Coil brush: a specialty tool designed to reach between coil fins without bending them
- Dry microfiber cloth: useful for wiping the grille panel or surrounding area, but not necessary directly on the coils themselves
- Compressed air (in a can, used for electronics): an option for reaching tight spaces, though it should be used in short bursts and away from open flames or heat sources, following the product label's instructions
Avoid any liquid cleaner, water, or damp cloth directly on the coils or nearby electrical components. Moisture near these parts creates an electrical safety risk and isn't necessary for the kind of dry buildup coils typically accumulate.
Eco-Friendly Coil Cleaning
Coil cleaning is naturally one of the more eco-friendly tasks in kitchen maintenance, since the most effective approach relies entirely on dry tools rather than chemical products. A vacuum and a coil brush handle the job completely without introducing any cleaning solution, packaging waste, or chemical runoff. This also makes it one of the safer tasks for households wanting to minimize product use around food-storage appliances, since there's no residue to worry about rinsing away or any chemical smell lingering near stored food.
Commercial Cleaner vs Natural Method for Refrigerator Coils
Because coil buildup is almost entirely dry debris (dust, pet hair, and lint) rather than grease or sticky residue, the comparison here looks a little different than it does for other kitchen surfaces.
|
Approach |
What it involves |
Best for |
Considerations |
|
Natural/dry method |
Vacuum and coil brush, no chemical product |
Nearly all coil cleaning situations |
Handles the vast majority of buildup without any added cost or risk |
|
Commercial coil cleaning spray |
A specialty spray marketed for condenser coils |
Rare cases of sticky residue or grease buildup near kitchen coils close to cooking areas |
Check that the product is specifically labeled safe for refrigerator coils and follow label instructions on rinsing or drying time, since some formulations require full drying before the unit is plugged back in |
For nearly every household, the dry method covers the job completely. A commercial coil spray is rarely necessary unless the refrigerator sits close to a stove or fryer and has picked up airborne grease in addition to the usual dust.

Photo Credit: Tima Miroshnichenko
What to Avoid When Cleaning Refrigerator Coils
A few habits lead to most of the problems people run into with this task.
- Cleaning coils while the refrigerator is still plugged in: always unplug the unit first to avoid any electrical risk
- Using water or a damp cloth directly on the coils: moisture near electrical components isn't safe and isn't needed for dry dust and debris
- Scrubbing hard enough to bend the fins: a light touch with a coil brush is more effective than forceful pressure
- Skipping the grille panel or fan area: dust often collects there too, and leaving it untouched reduces how effective the overall cleaning is
- Forgetting to plug the unit back in immediately after: an unplugged refrigerator warms up quickly, so this task is best done efficiently rather than left mid-process for an extended period
If your coils show heavy buildup, a burning smell, or any visible damage once the grille is removed, that's a point to stop and consult a qualified appliance technician rather than continuing with a DIY approach, since electrical or mechanical issues fall outside routine coil cleaning.
How Often Should You Clean Refrigerator Coils?
Most manufacturers and appliance guidance suggest cleaning condenser coils roughly twice a year for typical households. Homes with pets, particularly pets that shed heavily, may need to clean coils more often, closer to every three to four months, since pet hair accumulates on coils faster than ordinary household dust. If you notice the refrigerator running louder than normal, feeling warm along the sides, or struggling to keep food as cold as it used to, checking the coils sooner than your regular schedule is a reasonable step before assuming something more serious is wrong.

Photo Credit: Bastian Riccardi
Other Refrigerator Components Worth Checking
Coils aren't the only refrigerator part that benefits from occasional attention beyond daily cleaning. If your refrigerator has a built-in water dispenser or ice maker, these components have their own maintenance needs, from filter changes to descaling mineral buildup, that fall outside general coil or exterior cleaning. The Refrigerator Water Dispenser & Ice Maker Cleaning guide covers what that upkeep looks like, since it involves a different set of considerations than the dry, dust-focused process used for coils.
Frequently Asked Questions
What is the best way to clean refrigerator coils? Unplug the refrigerator, locate the coils behind the bottom grille or on the back panel, and use a vacuum with a crevice attachment along with a coil brush to remove dust and pet hair. No liquid cleaner is needed for most buildup.
How often should you clean refrigerator coils? Roughly twice a year for most households, though homes with heavily shedding pets may need to clean coils every three to four months.
What cleaning products are safe for refrigerator coils? A vacuum with a brush or crevice attachment and a specialty coil brush handle nearly all buildup. Liquid cleaners generally aren't needed and should be avoided directly on the coils.
What should you avoid when cleaning refrigerator coils? Avoid cleaning coils while the unit is plugged in, using water directly on the coils, and scrubbing hard enough to bend the metal fins.
How can you clean refrigerator coils without damaging them? Unplug the unit first, use a light touch with a coil brush to avoid bending fins, and stick to dry tools like a vacuum rather than introducing moisture near the coils or electrical components.
A Quick Note on Safety
Refrigerator coil cleaning involves working near electrical components, so unplugging the unit before starting is a necessary first step every time, not an optional precaution. Avoid water or liquid cleaners directly on the coils, since moisture near electrical parts creates unnecessary risk. If you notice a burning smell, visible damage, or unusual buildup that doesn't respond to normal cleaning, stop and contact a qualified appliance technician rather than continuing on your own, since some coil or compressor issues require professional diagnosis.
For more on keeping the rest of your kitchen clean, return to the complete kitchen cleaning guide.





Leave a Reply