

Bathroom tile and grout deal with more moisture, soap residue, and mineral buildup than almost any other surface in the house. The tile itself is usually easy to wipe clean, but grout is porous, which means it absorbs soap scum, body oils, and moisture in a way that solid tile doesn't. That difference is why bathroom tile and grout cleaning needs its own method, rather than treating grout like an extension of the tile around it.
This guide walks through a full bathroom tile and grout cleaning step-by-step guide, covering walls, floors, and shower grout separately, along with the products that are safe to use and the ones that can cause damage over time. You'll also find a bathroom tile and grout cleaning checklist near the end for quick reference. If you want the full picture of bathroom care first, you can go Back to the complete bathroom cleaning guide.
The Best Way to Clean Bathroom Tile and Grout
The most effective method separates tile cleaning from grout cleaning, since grout usually needs more time and a different product to fully lift buildup. Here is the short version:
- Clear the area and remove loose hair, dust, and debris.
- Wet the tile and grout with warm water.
- Apply a tile-safe cleaner to the tile surface.
- Apply a grout-specific cleaner to the grout lines.
- Let both sit for several minutes to loosen buildup.
- Scrub the tile with a soft brush or sponge.
- Scrub the grout lines with a stiffer, small brush.
- Rinse thoroughly with warm water.
- Dry or squeegee to prevent new water spots and mildew.
This order matters because grout typically needs a longer sit time than tile to break down soap scum and mineral deposits that have worked into its porous surface. Rushing this step means more scrubbing later, which can wear down grout faster than letting a cleaner do the work first.
How Often You Should Clean Bathroom Tile and Grout
Bathrooms stay humid longer than most rooms, which speeds up mold growth and buildup on both tile and grout. A general schedule looks like this:
- After each shower: A quick squeegee or wipe of shower walls helps prevent water spots and slows soap scum buildup on tile.
- Weekly: A full clean of tile surfaces, including bathroom walls and floors, keeps grime from setting in.
- Monthly: A deeper grout clean removes buildup that a quick wipe can't reach, especially in shower areas where moisture sits longest.
Several factors can push this schedule tighter. Homes with hard water build mineral deposits on tile faster, which can make grout lines look dingy even after a normal wipe-down. Bathrooms without a working exhaust fan hold moisture longer, giving mold more time to settle into grout. Households with heavier shower use also generate more soap scum, since more showers simply means more product residue landing on tile and grout each week.
If grout looks darker than usual, feels slightly soft, or has a musty smell even after cleaning, that's often a sign mold has worked past the surface and a stronger approach is needed.

Photo Credit: Hobby Guidebook Editorial
What Products Are Safe for Bathroom Tile and Grout Cleaning
Tile and grout don't always tolerate the same products, and the type of tile you have changes what's safe even further.
|
Surface |
Safe Options |
Avoid |
|
Ceramic or porcelain tile |
Mild dish soap, all-purpose cleaner, diluted vinegar |
Abrasive powders on glazed finishes |
|
Natural stone tile (marble, travertine) |
pH-neutral stone cleaner only |
Vinegar, lemon juice, or any acidic cleaner |
|
Standard grout |
Baking soda paste, grout-safe cleaner, diluted vinegar (non-stone tile only) |
Undiluted bleach on colored grout |
|
Colored or sanded grout |
Mild grout cleaner, baking soda paste |
Bleach, which can lighten or discolor grout over time |
|
Sealed grout |
Mild cleaner, occasional deeper clean |
Harsh acids, which can break down sealant faster |
Important: Vinegar and other acidic cleaners are useful on standard grout and most ceramic or porcelain tile, but they should never be used on natural stone. Acid can etch and permanently dull stone surfaces, and this damage isn't something you can clean away afterward. If you're not sure whether your tile is natural stone or a stone-look ceramic, test any new cleaner on a small, hidden section first and check for dulling or discoloration before treating the whole area.
For mold or mildew that's worked into grout, a diluted bleach solution is sometimes used, but bleach should never be applied to colored or sanded grout without checking that it's colorfast, since bleach can lighten grout unevenly. Bleach should also never be mixed with ammonia, vinegar, or other acidic cleaners, since that combination can release harmful fumes in the small, enclosed space of a bathroom. Always check the product label for correct dilution, since formulas vary by brand.
Tools That Make the Job Easier
A short list of tools handles most tile and grout cleaning situations without much fuss:
- A soft-bristle brush or non-abrasive sponge for tile surfaces.
- A stiff-bristled grout brush or an old toothbrush for grout lines, since these need more scrubbing power than flat tile.
- A squeegee for shower walls, used after each use to cut down on water spots and soap film.
- Microfiber cloths for drying tile without leaving lint or scratches.
- Rubber gloves, especially useful when working with grout cleaners or diluted bleach.
Steel wool, metal scrapers, and abrasive scouring pads should stay out of your regular routine. They can scratch glazed tile and wear down grout lines faster than a soft brush, which means more buildup collects in those scratches over time.
Step-by-Step: Cleaning Bathroom Tile
Tile picks up soap scum, body oils, and water spots, but it's generally easier to clean than grout since it's a smooth, non-porous surface.
- Clear and rinse. Remove any items from the area and rinse tile with warm water to loosen surface grime.
- Apply cleaner. Use a mild dish soap solution or all-purpose cleaner for ceramic and porcelain. For natural stone, use only a pH-neutral stone cleaner.
- Let it sit. Give the cleaner 3 to 5 minutes to break down soap scum, especially near the shower floor and lower wall tile where buildup is heaviest.
- Scrub gently. Use a soft brush or sponge, working in sections rather than trying to cover a full wall at once.
- Rinse well. Warm water clears leftover product and loosened residue.
- Dry or squeegee. This step reduces water spots and slows future mineral buildup, especially in homes with hard water.
Wall tile above the shower and around the sink often needs less frequent scrubbing than floor tile or shower tile, since it collects less direct soap and water contact. For material-specific guidance on wall tile, including glazed and unglazed finishes, see the full Cleaning Bathroom Wall Tile guide.
Step-by-Step: Cleaning Bathroom Grout
Grout needs more time and a different tool than tile, since it's porous and tends to hold onto buildup that a soft sponge can't fully lift.
- Apply a grout-safe cleaner directly onto the grout lines, avoiding excess product on the surrounding tile if possible.
- Let it sit for 10 to 15 minutes. Grout usually needs a longer wait time than tile to loosen soap scum and mineral deposits that have settled into its surface.
- Scrub with a stiff brush, using small, consistent strokes along the grout line rather than pressing hard in one spot.
- Check for remaining stains. If grime remains after scrubbing, a baking soda paste applied directly to the line and left for a few more minutes can help lift stubborn buildup.
- Rinse thoroughly, making sure to clear cleaner residue from the grout itself, not just the tile around it.
- Dry the area, since damp grout is more likely to develop mold again quickly if left wet.
If grout looks discolored even after a thorough clean, it may have mold growth beneath the surface rather than just surface staining, which sometimes calls for a stronger, mold-specific product or professional attention if it keeps returning. For a closer look at shower-specific grout buildup, mold prevention, and sealing, see the Cleaning Shower Tile Grout guide.
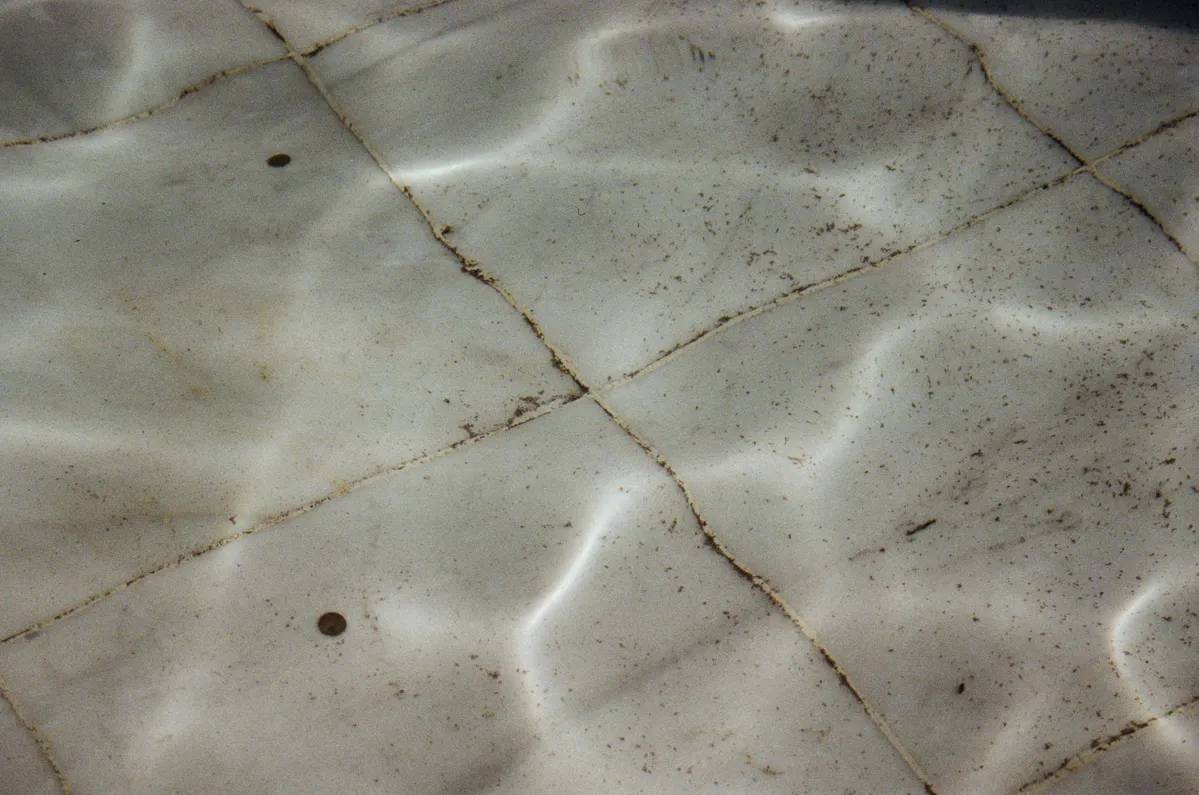
Photo Credit: mas_hha
What to Avoid When Cleaning Tile and Grout
A few common habits cause more harm than good, even when the goal is a deeper clean.
- Avoid abrasive scrubbers like steel wool or scouring powders on glazed tile, since they dull the finish and create scratches that trap dirt faster.
- Avoid mixing bleach with ammonia, vinegar, or other acidic cleaners, since this releases harmful fumes even in a ventilated bathroom.
- Avoid using vinegar or acidic cleaners on natural stone, since even a diluted solution can etch and permanently dull the surface.
- Avoid leaving bleach on colored or sanded grout too long, since extended contact can cause uneven lightening.
- Avoid skipping the rinse step. Leftover cleaner residue can attract dirt and grime faster than a surface that wasn't cleaned at all.
How to Clean Tile and Grout Without Damaging Them
Damage usually comes from a mismatch between product and material, not from cleaning too often. A few habits protect your surfaces long term:
- Identify your tile type (ceramic, porcelain, or natural stone) before choosing a cleaner.
- Use non-abrasive tools as your default, saving firmer scrubbing for isolated stains.
- Test new products on a small, hidden section first, especially with stone or colored grout.
- Rinse thoroughly after every cleaning session so no product residue sits on tile or in grout lines.
- Dry or squeegee after cleaning to prevent water spots and slow future mineral buildup.
If your grout has a sealant applied, avoid harsh acids and check how often the sealant needs reapplying, since strong cleaners can wear it down faster than normal use. Following manufacturer instructions on any product label takes priority over general advice, since formulas and safe usage vary between brands.
Common Mistakes to Avoid
Even careful homeowners fall into a few repeat mistakes:
- Treating grout the same as tile. Grout is porous and usually needs a longer sit time and a stiffer brush to get truly clean.
- Using the same cleaner on every tile type. A product safe for ceramic can still damage natural stone.
- Scrubbing too hard instead of letting cleaner work. Extra sit time reduces the scrubbing needed and protects grout from wearing down.
- Ignoring early mold or mildew spots. Small discoloration in grout is far easier to address than mold that's had months to spread.
- Skipping ventilation. Running a fan or opening a window while cleaning helps products work safely and helps tile and grout dry faster afterward.

Photo Credit: Liliana Drew
How Long a Full Bathroom Tile and Grout Clean Takes
A routine weekly clean of tile surfaces typically takes 15 to 20 minutes for an average-sized bathroom. Adding a full grout clean, including sit time and scrubbing, can bring a deeper clean to 40 to 50 minutes, especially in a shower area with heavy grout coverage. Homes with hard water, heavy mold buildup, or grout that hasn't been deep cleaned in a while may need extra time for soaking and repeat treatment on stubborn spots.
Bathroom Tile and Grout Cleaning Checklist
Use this quick checklist for a weekly clean:
- Clear the area of bottles, mats, and loose items.
- Rinse tile and grout with warm water.
- Apply a tile-safe cleaner to walls and floors.
- Apply a grout-specific cleaner to grout lines.
- Let both sit for several minutes.
- Scrub tile with a soft brush or sponge.
- Scrub grout with a stiffer brush.
- Rinse thoroughly.
- Dry or squeegee the full area.
For a broader look at tile and grout care beyond the bathroom, including different rooms and surface types, see the Tile & Grout Cleaning Guide.
Frequently Asked Questions
What is the best way to clean bathroom tile and grout? Wet the surfaces, apply a tile-safe cleaner to the tile and a grout-specific cleaner to the grout lines, let both sit, scrub separately, rinse well, and dry or squeegee to finish.
How often should you clean bathroom tile and grout? A quick wipe or squeegee after each shower, a full tile clean weekly, and a deeper grout clean monthly, more often in homes with hard water or heavy use.
What cleaning products are safe for bathroom tile and grout? Mild dish soap or diluted vinegar works for ceramic and porcelain tile and standard grout, but natural stone needs a pH-neutral cleaner and should never be cleaned with vinegar or other acids.
What should you avoid when cleaning bathroom tile and grout? Avoid abrasive scrubbers on glazed tile, avoid mixing bleach with ammonia or acidic cleaners, and avoid leaving bleach on colored grout too long.
How can you clean bathroom tile and grout without damaging them? Identify your tile type first, use non-abrasive tools, test new products in a hidden spot, and rinse and dry thoroughly after every clean.
What common mistakes should you avoid with bathroom tile and grout? Treating grout the same as tile, using one cleaner on every surface, scrubbing instead of letting cleaner sit, and ignoring early mold spots in grout.
For the full room-by-room approach to bathroom care, Explore the complete bathroom cleaning guide.
A Quick Note on Safety
Some products discussed here, including bleach-based cleaners and acidic solutions, need careful handling. Always follow the instructions and dilution guidance on the product label, since formulas vary between manufacturers. Never mix bleach with ammonia, vinegar, or other acidic cleaners, as this can release harmful fumes. Keep the bathroom ventilated with a fan or open window while cleaning, and wear gloves if you have sensitive skin or are using a stronger product. If mold in your grout is widespread, keeps returning after cleaning, or covers a large area, it may point to a larger moisture problem that a professional should evaluate.



Leave a Reply