

Bathroom walls and ceilings deal with a kind of buildup most other rooms never see. Every hot shower sends steam upward, and that moisture settles on paint, tile, and ceiling surfaces long after the water's turned off. Combined with splashed soap, hairspray residue, and limited airflow, this makes bathroom wall cleaning a different task than wiping down walls anywhere else in the house.
This guide gives you a bathroom wall and ceiling cleaning step-by-step guide, covering painted surfaces, tile walls, and the ceiling itself, along with the mold risks that come with trapped moisture. You'll also find a bathroom wall and ceiling cleaning checklist to keep the routine simple. If you want the full picture of bathroom care first, you can go Back to the complete bathroom cleaning guide.
The Best Way to Clean Bathroom Walls and Ceilings
The most effective approach works from the ceiling down, since dust and moisture from above will otherwise fall onto walls you've already cleaned. Here's the short version:
- Ventilate the room by running the exhaust fan or opening a window.
- Dust the ceiling and upper walls with a dry microfiber tool.
- Spot check for mold or mildew before applying any cleaner.
- Apply a cleaner suited to the wall surface (painted, tile, or other).
- Wipe or scrub gently, working top to bottom.
- Rinse if needed and dry with a clean cloth.
- Run the fan afterward to help the space finish drying.
This order matters because dry dusting first removes loose debris that would otherwise turn into a muddy film once it mixes with a wet cleaner. Working top to bottom also means any drips land on a wall section you're about to clean anyway, not one you already finished.
How Often You Should Clean Bathroom Walls and Ceilings
Moisture is the main driver behind how often these surfaces need attention. A general schedule looks like this:
- Weekly: Wipe down shower-adjacent walls and tile where soap scum and water spots build up fastest.
- Monthly: Dust the full ceiling and wipe down painted walls throughout the room, including areas away from the shower.
- Every few months: Do a closer inspection of ceiling corners, exhaust fan covers, and any spot prone to condensation, checking for early mold or mildew.
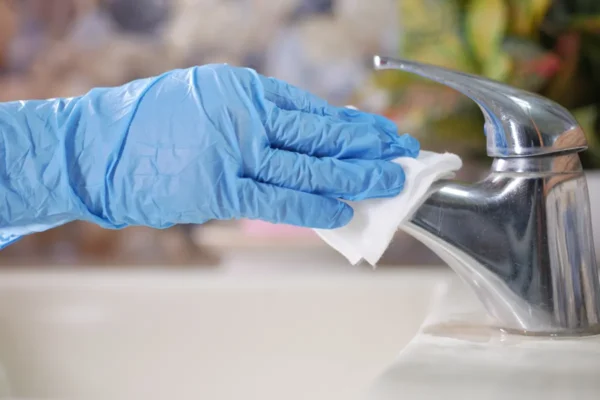
Bathrooms without a working exhaust fan, or with a fan that isn't run long enough after showers, tend to need more frequent ceiling checks, since trapped humidity is the main condition mold needs to grow. Homes with hard water may also see more mineral spotting on tile walls near the shower, which can call for extra wiping in that specific zone. If you notice small dark spots forming in a ceiling corner or along the top of the shower wall, that's usually an early sign that moisture is sitting there longer than it should.

Photo Credit: Hobby Guidebook Editorial
What Products Are Safe for Bathroom Wall and Ceiling Cleaning
Painted drywall, tile, and ceiling surfaces don't all respond to the same products, so it helps to match the cleaner to what you're actually working with.
|
Surface |
Safe Options |
Avoid |
|
Painted walls (semi-gloss or satin) |
Mild dish soap and water, all-purpose cleaner |
Abrasive scrubbers, strong solvents |
|
Painted walls (flat or matte) |
Mild soap and water, gentle wiping only |
Scrubbing, which can burnish or remove flat paint |
|
Ceramic or porcelain tile walls |
Mild dish soap, all-purpose cleaner, diluted vinegar |
Abrasive powders on glazed finishes |
|
Painted ceiling |
Mild soap and water for light dust and splatter |
Heavy scrubbing, which can leave visible marks |
|
Mold or mildew spots |
Diluted bleach solution (non-porous surfaces only) or a mold-specific cleaner |
Bleach mixed with ammonia, vinegar, or other cleaners |
Important: Flat and matte paint finishes are more delicate than semi-gloss, and scrubbing them can leave a shiny or burnished patch that stands out once it dries. If you're not sure what paint finish is on your bathroom walls, wipe gently with plain water first and check a small section before using any cleaner.
For mold or mildew on non-porous surfaces like tile or sealed paint, a diluted bleach solution is sometimes appropriate, but bleach should never be used on unsealed drywall or porous surfaces, since it won't fully kill mold below the surface and can damage the material. Bleach should also never be mixed with ammonia, vinegar, or other acidic cleaners, since this combination can release harmful fumes in a small, enclosed bathroom. Always check the product label for correct dilution and ventilation guidance before use.
Tools That Make the Job Easier
A short list of tools covers most wall and ceiling cleaning needs:
- An extendable microfiber duster for the ceiling and upper walls, useful for dust and cobwebs without needing a ladder in most bathrooms.
- A soft sponge or microfiber cloth for painted walls and tile.
- A soft-bristle brush for tile grout lines along the wall.
- A step stool, if your bathroom ceiling is taller than arm's reach with an extendable duster.
- Rubber gloves, especially when using a bleach solution or working on visible mold.
Keep a separate cloth for mold or mildew spots rather than reusing it on clean sections of wall. This keeps you from spreading spores to areas that weren't previously affected.
Step-by-Step: Cleaning Painted Bathroom Walls
Painted walls need a gentler touch than tile, since paint can wear, dull, or burnish if scrubbed too hard.
- Dust first. Use a dry microfiber cloth or duster to remove loose dust and any cobwebs before introducing water.
- Test your cleaner. Apply a small amount of mild soap and water to a hidden section, like behind a door or inside a closet wall, and check for any change in finish after it dries.
- Wipe gently. Use a soft sponge or cloth with mild soap and water, working in sections rather than soaking the whole wall at once.
- Rinse with a damp cloth. This clears soap residue that can otherwise leave a dull film once dry.
- Dry the wall. A clean, dry cloth prevents water spots and helps you spot any areas that need a second pass.
- Check for peeling or bubbling paint. This usually signals moisture getting behind the paint layer, which cleaning alone won't fix.
Semi-gloss and satin paint, common in bathrooms because they resist moisture better than flat finishes, generally tolerate more frequent wiping than flat paint. For more detail on paint finish differences and how to handle stains or peeling on painted bathroom walls, see the full Painted Bathroom Wall Cleaning guide.
Step-by-Step: Cleaning Tile Walls and the Ceiling
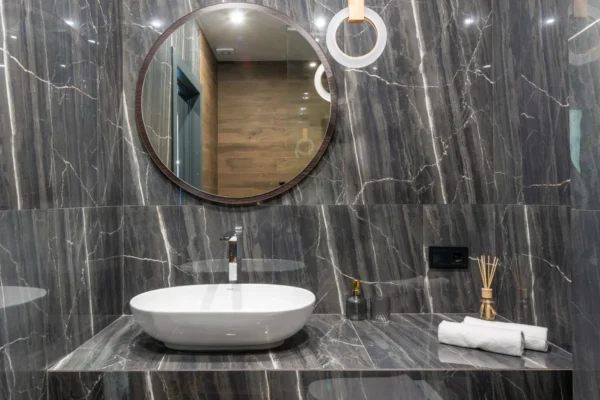
Tile walls, usually found around the shower or tub, and the ceiling above them face the heaviest moisture exposure in the room.
- Ventilate first. Run the exhaust fan or open a window before starting, since this task often involves closer contact with the ceiling.
- Dust the ceiling. Use an extendable duster to remove loose dust and cobwebs, checking corners and the area around any exhaust fan cover.
- Apply cleaner to tile walls. Use a mild dish soap solution or all-purpose cleaner, letting it sit for 2 to 3 minutes on areas with visible soap scum.
- Scrub grout lines separately, since grout usually needs a stiffer brush and a longer sit time than the tile itself.
- Wipe the ceiling with a lightly damp cloth, only if there's visible splatter or grime, since ceilings generally need less frequent wet cleaning than walls.
- Rinse tile thoroughly and dry both the tile and any ceiling section you cleaned to reduce water spots and slow future buildup.
If you spot dark spots or a musty smell on the ceiling or tile walls, this is often mold that's already taken hold rather than surface dirt, and a stronger, targeted approach may be needed. For a full breakdown of identifying mold versus mildew, safe removal methods, and prevention steps for walls near the shower, see the Removing Mold from Bathroom Walls guide.

Photo Credit: Alex Tyson
What to Avoid When Cleaning Bathroom Walls and Ceilings
A few habits cause more harm than good, even with good intentions.
- Avoid scrubbing flat or matte paint, since firm pressure can leave a shiny, burnished patch that doesn't blend back in.
- Avoid mixing bleach with ammonia, vinegar, or other acidic cleaners, as this combination releases harmful fumes.
- Avoid using bleach on unsealed drywall or porous ceiling material, since it won't fully address mold growing beneath the surface.
- Avoid abrasive scrubbers on tile, which can scratch glazed finishes and grout lines.
- Avoid skipping ventilation while cleaning, since closed-door cleaning traps both moisture and cleaning product fumes in a small space.
How to Clean Without Damaging Your Walls or Ceiling
Damage typically comes from mismatched products or technique rather than cleaning too often. A few habits protect your surfaces long term:
- Identify your paint finish (flat, satin, or semi-gloss) before deciding how much pressure to use.
- Test any new cleaner on a hidden section of wall first.
- Dust before wiping to avoid dragging debris across the surface.
- Dry walls and ceiling sections after cleaning to prevent water spots and slow mold growth.
- Address peeling paint, bubbling, or persistent dark spots early, since these often point to a moisture issue that cleaning alone won't resolve.
Following manufacturer instructions on any cleaning product label takes priority over general advice, since formulas and safe usage vary between brands.
Common Mistakes to Avoid
Even careful homeowners fall into a few repeat mistakes:
- Skipping the ceiling entirely. Dust and moisture collect there just as much as on the walls, even if it's less visible day to day.
- Using the same cleaner on tile and painted walls. A product safe for glazed tile can dull or affect painted surfaces differently.
- Scrubbing instead of letting cleaner sit. This is especially damaging on flat paint, where extra pressure leaves visible marks.
- Ignoring early mold spots. Small discoloration is far easier to address than mold that's had months to spread across a ceiling corner.
- Not running the exhaust fan after cleaning. Wet walls left in a closed, humid room dry slower and are more likely to develop new mold.

Photo Credit: Liliana Drew
How Long a Full Bathroom Wall and Ceiling Clean Takes
A routine weekly wipe-down of shower-adjacent walls typically takes 10 to 15 minutes. A full monthly clean, including dusting the ceiling and wiping down all painted walls in the room, usually takes 25 to 35 minutes for an average-sized bathroom. Homes dealing with visible mold spots, heavy soap scum, or a ceiling that hasn't been dusted in a while may need extra time for a more thorough first pass.
Bathroom Wall and Ceiling Cleaning Checklist
Use this quick checklist for a routine clean:
- Run the exhaust fan or open a window.
- Dust the ceiling and upper walls.
- Spot check for mold or mildew.
- Apply the correct cleaner for the surface.
- Wipe or scrub gently, top to bottom.
- Rinse tile and grout thoroughly.
- Dry all wiped surfaces.
- Leave the fan running after cleaning.
If your bathroom includes open shelving or wall-mounted storage near the shower, keeping that area tidy makes wall cleaning faster, since there's less to move around each time. For layout ideas that keep walls clear and easier to wipe down, see the Bathroom Shelving & Wall Storage Guide.
Frequently Asked Questions
What is the best way to clean bathroom wall and ceiling? Ventilate the room, dust the ceiling and upper walls first, then apply a cleaner matched to the surface (painted or tile), wiping from top to bottom and drying afterward.
How often should you clean bathroom wall and ceiling? A weekly wipe of shower-adjacent walls, a monthly clean of the full ceiling and remaining walls, and a closer inspection every few months for early mold or mildew.
What cleaning products are safe for bathroom wall and ceiling? Mild soap and water works for most painted walls and tile. Diluted bleach can address mold on non-porous surfaces, but it should never be used on unsealed drywall or mixed with ammonia or vinegar.
What should you avoid when cleaning bathroom wall and ceiling? Avoid scrubbing flat or matte paint, avoid abrasive scrubbers on tile, and avoid mixing bleach with other cleaning products.
How can you clean bathroom wall and ceiling without damaging them? Identify your paint finish first, test cleaners in a hidden spot, dust before wiping, and dry surfaces thoroughly after cleaning.
What common mistakes should you avoid with bathroom wall and ceiling? Skipping the ceiling, using one cleaner on every surface, scrubbing instead of letting cleaner sit, and not running the fan after cleaning.
For the full room-by-room approach to bathroom care, Read the full bathroom cleaning guide.
A Quick Note on Safety
Cleaning bathroom walls and ceilings sometimes involves bleach-based products for mold and mildew, which need careful handling. Always follow the dilution and ventilation instructions on the product label, since formulas vary between manufacturers. Never mix bleach with ammonia, vinegar, or other acidic cleaners, as this can release harmful fumes. Keep the bathroom ventilated with a fan or open window while cleaning, and wear gloves if you're working with a stronger product or visible mold. If mold covers a large area, keeps returning after cleaning, or appears alongside peeling paint or a persistent musty smell, it may point to a moisture problem behind the wall that a professional should evaluate.


Leave a Reply