

A clean bathtub isn't just about looks. Soap scum, hard water buildup, and hidden moisture in cracks and around the drain create the exact conditions mold and mildew need to grow. Bathtub cleaning done the right way removes that buildup before it turns into a bigger problem, and it protects the surface of the tub itself, since the wrong product or tool can dull, scratch, or discolor a finish that's expensive to repair.
This guide covers how often to clean a bathtub, what products are actually safe to use, the tools worth keeping on hand, and a step-by-step process that works for most standard tubs. This article is Part of Bathtub & Shower Cleaning Guide, which covers the shower side of the space in more depth.
The Fastest Way to Clean a Bathtub
If you only have a few minutes, here's the short version:
- Rinse the tub with warm water to loosen surface grime.
- Sprinkle baking soda or apply a mild bathroom cleaner across the surface.
- Scrub with a non-abrasive sponge or soft brush, working in small circles.
- Rinse thoroughly and dry with a towel or squeegee to prevent water spots.
This works well for routine upkeep. Heavier buildup, rust stains, or mold call for a more thorough approach, which is covered step by step below.
Signs Your Bathtub Needs Cleaning
Some buildup is easy to spot. Other signs are easier to miss until they've been building for a while.
- A dull or cloudy finish where the tub used to look glossy, usually a sign of hard water film or soap scum buildup.
- A gritty or slippery texture on the tub floor, which is often a mix of soap residue and body oils.
- Visible rings around the waterline left after the tub drains.
- Pink, orange, or black spots near the drain or in corners, which can indicate mold, mildew, or bacterial buildup rather than dirt.
- A musty smell even after the tub has dried, which usually means moisture is trapped somewhere it shouldn't be, like around caulk or the overflow drain.
If you're noticing any of these signs, it's a good indicator that a routine rinse won't be enough this time.
How Often Should You Clean a Bathtub
For most households, a light bathtub cleaning once a week keeps buildup from becoming a real problem. Households with hard water, frequent bath use, or young kids who bathe daily may need to clean twice a week, since soap residue and mineral deposits build up faster under those conditions.
A deeper clean, one that addresses grout lines, the drain area, and any early mold spots, is worth doing about once a month, even in tubs that get a quick wipe-down regularly. Waiting longer than that tends to let hard water film and soap scum harden into a layer that takes real effort to remove.
Tools and Supplies for Bathtub Cleaning
Having the right tools on hand makes the difference between a quick clean and a frustrating one. A basic bathtub cleaning kit includes:
- A non-abrasive sponge or soft-bristle brush, sized for reaching corners and the area around the drain.
- A grout brush or old toothbrush, useful for tile lines and any small crevices around fixtures.
- A microfiber cloth, for drying and buffing after rinsing.
- A spray bottle, if you're using a homemade solution rather than a store-bought spray.
- Rubber gloves, especially when using stronger commercial cleaners or working with mold.
- A squeegee, optional but useful for wiping down the tub walls after a shower to slow down water spot buildup between cleanings.
Avoid steel wool, scouring pads, or anything labeled as heavy-duty abrasive. These can scratch porcelain, cast iron enamel, and acrylic surfaces, and once a scratch is there, it tends to trap more grime going forward.
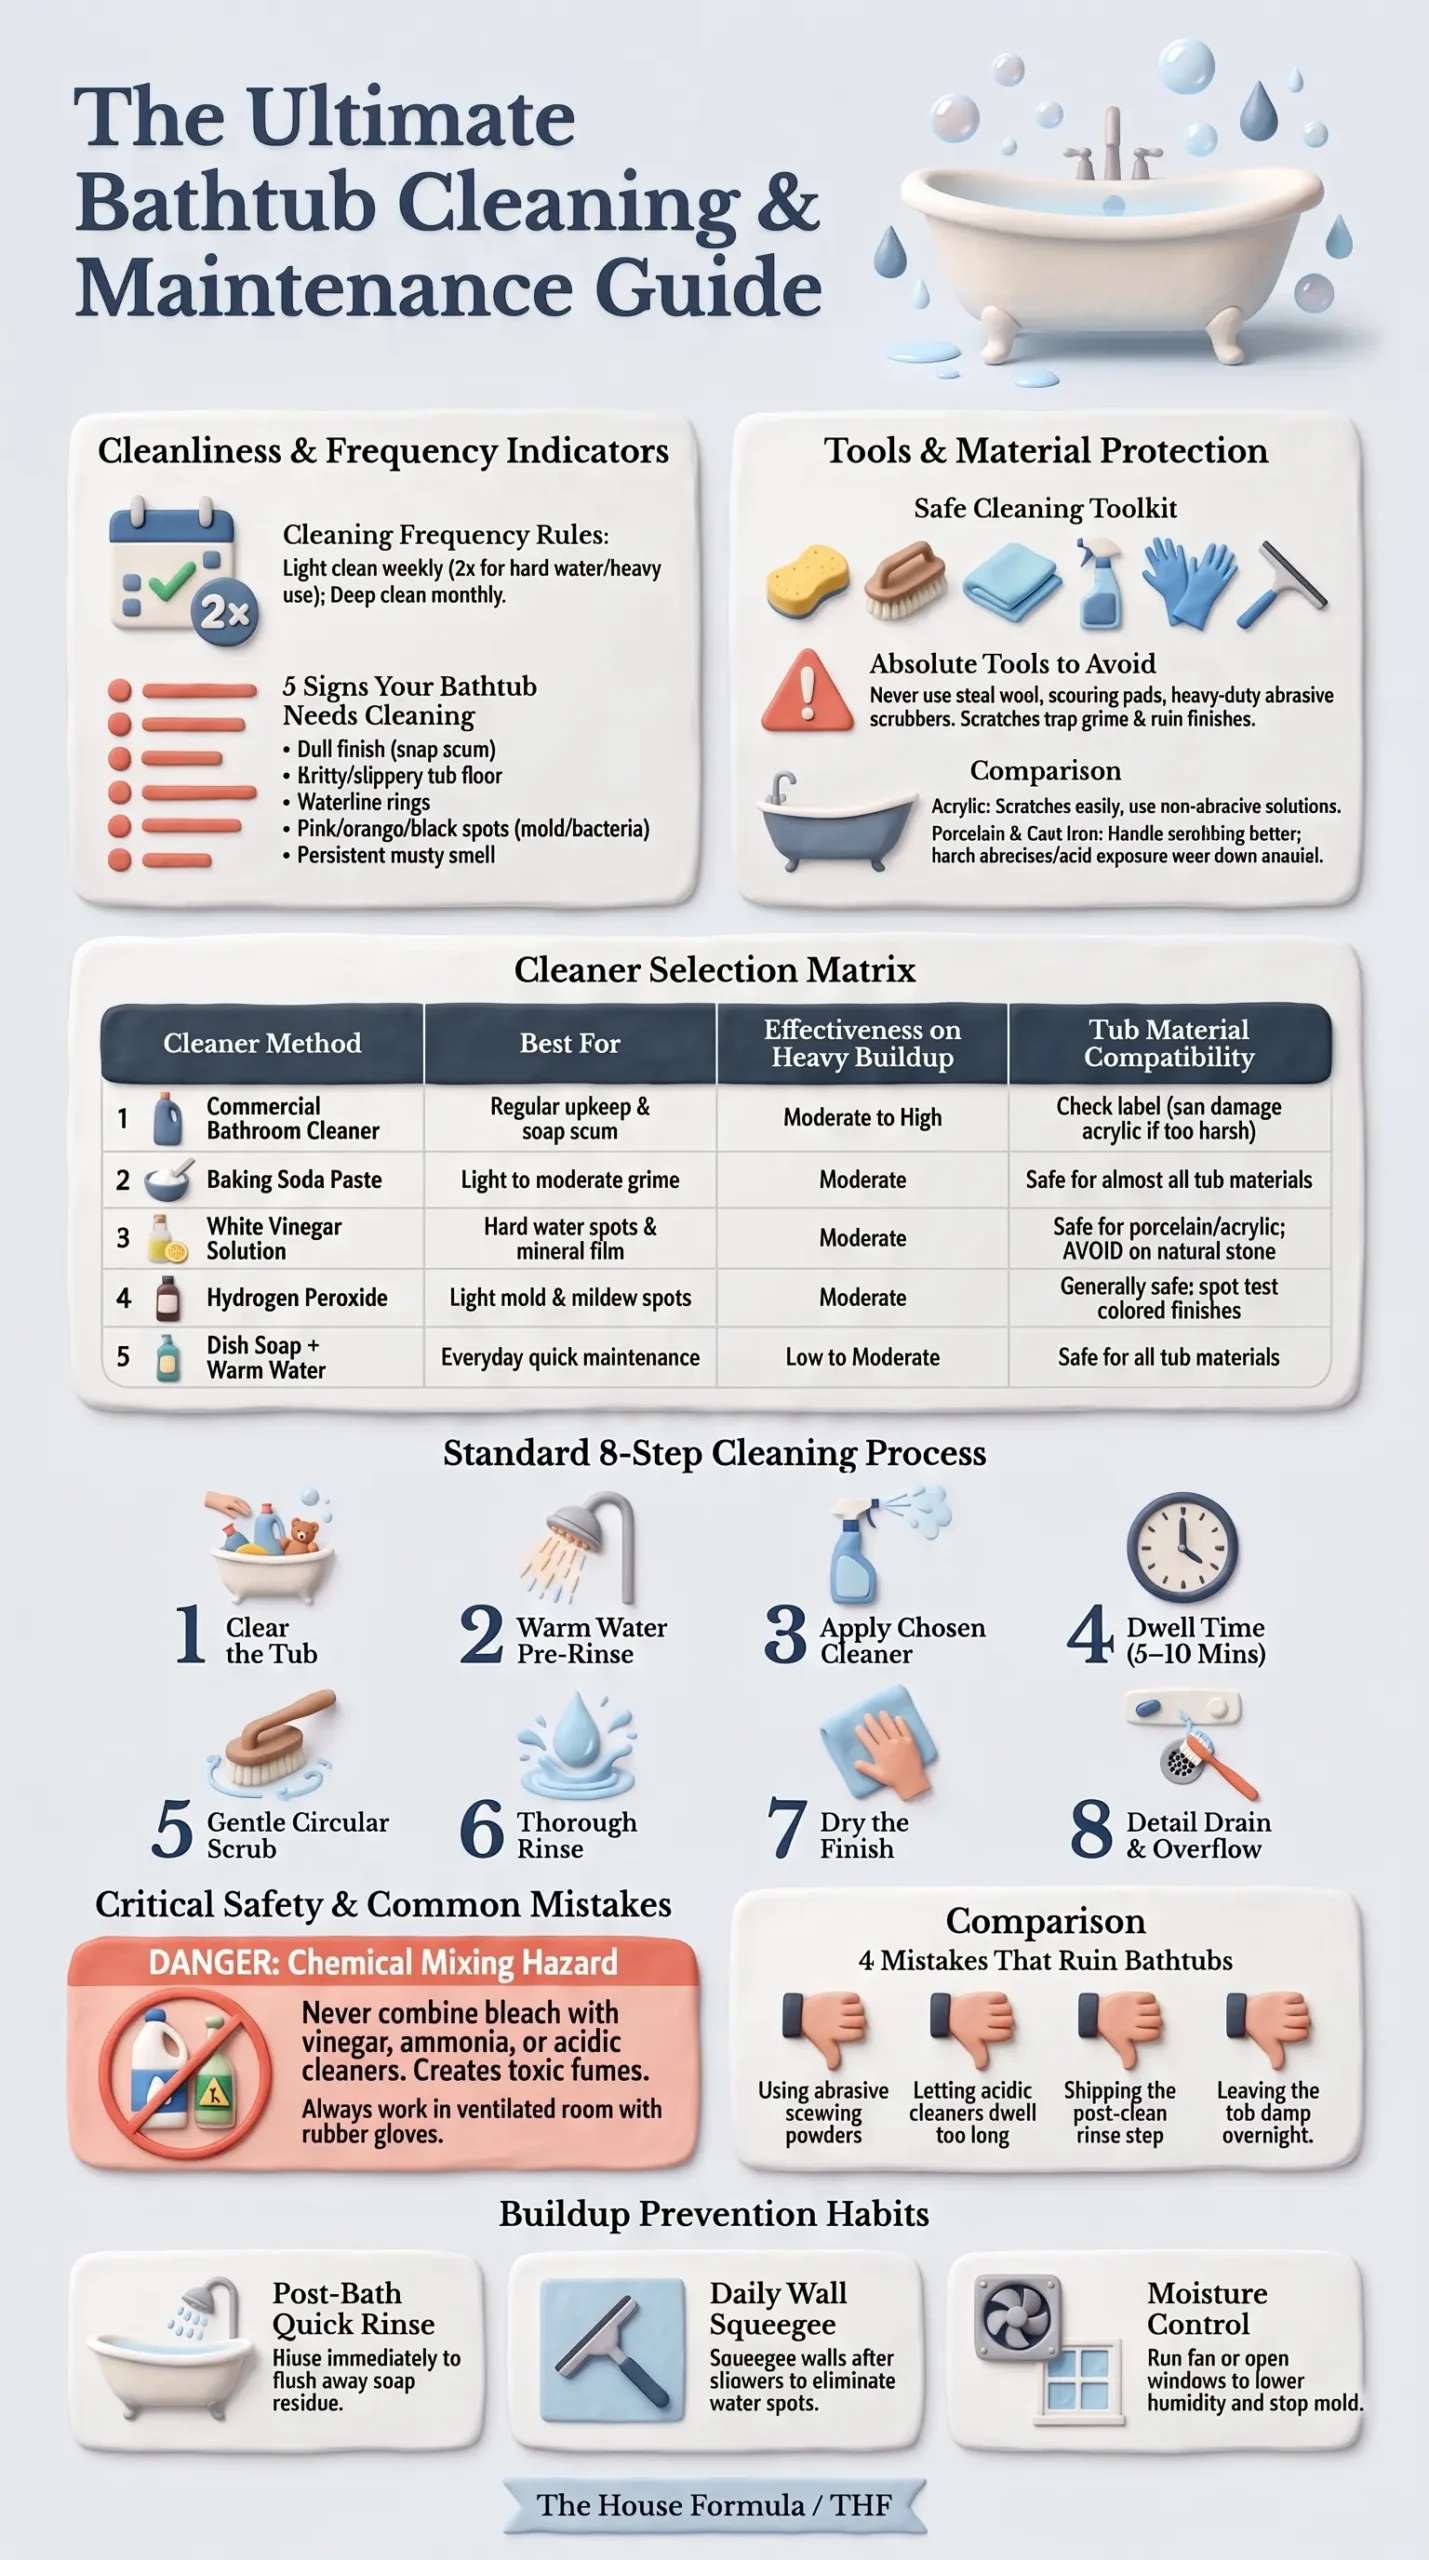
Photo Credit: Hobby Guidebook Editorial
Commercial Cleaners vs. Natural Methods
Both approaches can work well for bathtub cleaning, and the right choice usually depends on how much buildup you're dealing with and what your tub is made of.
|
Method |
Best For |
Effectiveness on Heavy Buildup |
Tub Compatibility |
|
Commercial bathroom cleaner |
Regular upkeep, mild soap scum |
Moderate to high, depending on formula |
Check label; some formulas are too harsh for acrylic |
|
Baking soda paste |
Light to moderate grime, gentle scrubbing |
Moderate |
Safe for most tub materials |
|
White vinegar solution |
Hard water spots, mineral film |
Moderate |
Avoid on natural stone; safe for most porcelain and acrylic |
|
Hydrogen peroxide |
Light mold or mildew spots |
Moderate |
Generally safe; test first on colored finishes |
|
Dish soap and warm water |
Everyday light cleaning |
Low to moderate |
Safe for nearly all tub materials |
Commercial cleaners can save time and are formulated for specific problems like soap scum or hard water film, but always check the label for compatibility with your tub's material. Natural methods like baking soda and vinegar are gentler and lower cost, but they work more slowly on heavy buildup and may need repeated applications.
Never combine bleach-based cleaners with vinegar, ammonia, or other acidic products. Mixing these can release harmful fumes. If you want to use bleach for mold or mildew, use it on its own, in a well-ventilated bathroom, and rinse the area thoroughly afterward.
Step-by-Step Bathtub Cleaning Process
This process works for a standard weekly or monthly clean. For heavier buildup, expect to repeat the scrubbing step or let a product sit longer before rinsing.
- Clear the tub. Remove bottles, toys, bath mats, and anything else sitting in or around the tub.
- Rinse with warm water. This loosens loose dirt and body oils before you apply any product, so your cleaner works on the actual buildup rather than surface debris.
- Apply your chosen cleaner. Whether it's a commercial spray, a baking soda paste, or a vinegar solution, cover the tub surface evenly, paying extra attention to the waterline ring, corners, and the area around the drain.
- Let it sit. Most cleaners work better with a short dwell time, generally 5 to 10 minutes, though this varies by product. Check the label for a commercial cleaner's recommended contact time.
- Scrub with a non-abrasive sponge or brush. Work in small circular motions, applying steady but gentle pressure. Avoid pressing hard enough to feel resistance from the surface itself, since that's usually a sign you're at risk of scratching it.
- Rinse thoroughly. Leftover cleaner residue can actually attract more grime over time, so a full rinse matters as much as the scrubbing.
- Dry the surface. Wipe down with a microfiber cloth or use a squeegee on the walls. A dry tub is less inviting to mold and mildew than one left to air dry slowly.
- Check the drain and overflow cover. These areas trap hair and soap residue that a general wipe-down often misses, so give them a quick separate scrub if needed.
Cleaning by Tub Material
Not every bathtub is made the same way, and the wrong cleaning method can dull a finish or cause damage that's difficult to reverse. Two of the most common materials call for noticeably different approaches.
Acrylic tubs have a smooth, glossy surface that scratches more easily than people expect. Abrasive powders, scouring pads, and some strong commercial cleaners can leave fine scratches that dull the shine over time and make the surface harder to keep clean going forward. For a full breakdown of safe products and techniques specific to this material, see Acrylic Bathtub Cleaning.
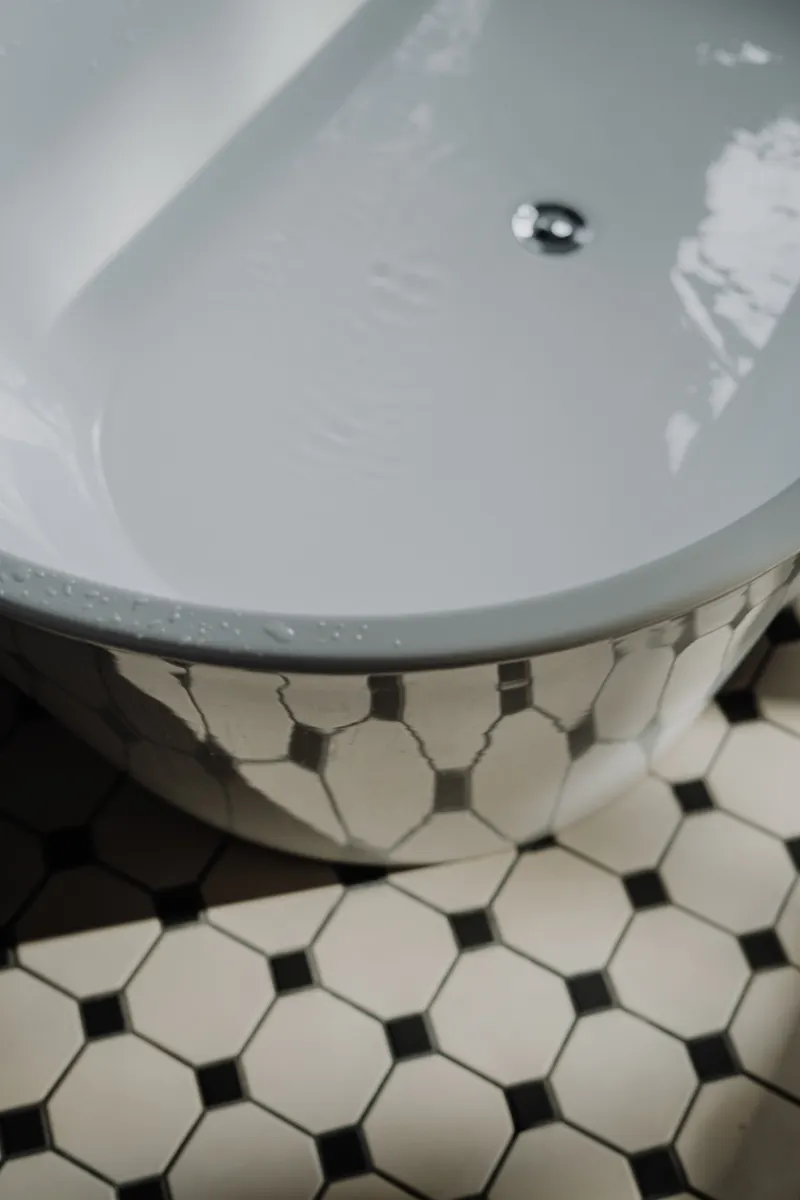
Photo Credit: cottonbro studio
Porcelain and cast iron tubs are more resistant to scratching than acrylic, but the enamel coating can still wear down with repeated use of harsh abrasives or certain acidic cleaners left on too long. These tubs also tend to be heavier and colder to the touch, which can affect how quickly cleaning products dry on the surface during use. For material-specific guidance, see Porcelain & Cast Iron Bathtub Cleaning.
If you're not sure what your tub is made of, avoid anything abrasive and stick to a soft sponge with a mild cleaner or baking soda paste until you've confirmed the material. Testing any new product on a small, hidden area first is a reasonable precaution regardless of the material.
Removing Soap Scum, Hard Water Buildup, and Rust Stains
These three problems are the most common reasons a bathtub looks dull even after a regular wipe-down, and each one responds to a slightly different approach.
Soap scum is a film made of soap residue mixed with minerals and body oils. It usually responds well to a baking soda paste or a commercial soap scum remover, applied and left to sit for a few minutes before scrubbing.
Hard water buildup shows up as a cloudy or chalky film, especially in homes with hard water. A vinegar and water solution, left to sit for 10 to 15 minutes before scrubbing, often loosens this kind of mineral deposit effectively. Avoid using vinegar on natural stone surfaces, since the acidity can etch stone over time.
Rust stains, often caused by a leaking faucet or metal fixtures, usually need a rust-specific cleaner or a paste made from baking soda and a small amount of hydrogen peroxide. Rust stains can be stubborn, and using bleach on them is generally ineffective since bleach doesn't break down rust the way it does organic stains. If a rust stain doesn't respond after a couple of attempts, it may be worth having the source of the rust (usually a fixture) checked, since the stain will keep coming back otherwise.
Preventing and Removing Mold and Mildew in the Bathtub
Mold and mildew favor the same conditions bathtubs naturally create: moisture, warmth, and organic material like soap residue or skin cells to feed on. Small spots, especially around caulk lines or the edges of the tub, can usually be treated with a diluted bleach solution or hydrogen peroxide, applied directly and left to sit before rinsing.
For larger areas of mold, or mold that keeps returning despite regular cleaning, the underlying moisture problem needs attention too. This might mean improving bathroom ventilation, fixing a slow leak, or replacing worn caulk that's letting water seep behind the tub surface. Cleaning the visible mold without addressing the moisture source usually means it comes back within a few weeks.
Common Mistakes to Avoid When Cleaning a Bathtub
A few habits show up often and tend to cause more harm than the buildup they're meant to fix.
- Using abrasive pads or powders on acrylic tubs. Even a small amount of scratching accumulates over time and dulls the finish permanently.
- Letting cleaner sit far longer than the label recommends. Some products, especially acidic ones, can damage grout or caulk if left on too long.
- Skipping the rinse step. Leftover product residue can attract dirt faster than a truly clean surface would.
- Mixing cleaning products without checking labels. Combining bleach with vinegar, ammonia, or other acidic cleaners can produce dangerous fumes.
- Ignoring the drain and overflow area. These spots collect hair and soap scum that a surface wipe-down alone won't reach.
- Not drying the tub after cleaning. A damp surface left overnight gives mold and mildew a head start before your next clean.
Photo Credit: Skylar Kang
How to Clean a Bathtub Without Damaging It
Protecting the tub's finish comes down to a few consistent habits: choosing the gentlest product that will actually get the job done, avoiding anything abrasive unless the surface is specifically rated for it, and never leaving strong chemicals on the surface longer than the label suggests. Testing a new cleaner on a small, hidden area, like near the drain or under the faucet, is a simple way to check for discoloration or damage before using it across the whole tub.
It also helps to match your cleaning method to your tub's actual material rather than using the same approach on every surface. What works safely on porcelain isn't always safe on acrylic, and using an overly aggressive method out of habit is one of the more common ways people accidentally damage a tub they've had for years.
Preventing Buildup Between Cleanings
A few small habits make each cleaning session faster and reduce how often you need a deep scrub:
- Squeegee the tub walls after each use, especially in households that shower rather than bathe most days.
- Rinse the tub after each bath, rather than letting soap residue sit and dry.
- Run the bathroom fan or open a window during and after baths to reduce lingering moisture.
- Wipe down the drain area weekly, since this spot tends to collect hair and soap residue faster than the rest of the tub.
These habits won't replace a regular cleaning routine, but they slow down how quickly buildup forms, which makes each cleaning session shorter and easier.
Frequently Asked Questions
What is the best way to clean a bathtub? Rinse the tub, apply a cleaner suited to the type of buildup (soap scum, hard water, or mold), let it sit briefly, scrub gently with a non-abrasive sponge, then rinse and dry thoroughly.
How often should you clean a bathtub? A light clean once a week works for most households, with a deeper clean about once a month. Hard water or heavy daily use may call for cleaning twice a week.
What cleaning products are safe for a bathtub? Mild dish soap, baking soda, white vinegar, hydrogen peroxide, and commercial bathroom cleaners labeled for your tub's material are generally safe. Always check the label against your specific tub material first.
What should you avoid when cleaning a bathtub? Avoid abrasive pads and powders, especially on acrylic tubs, and never mix bleach with vinegar, ammonia, or other acidic products.
How can you clean a bathtub without damaging it? Use the gentlest effective product, match your method to your tub's material, avoid leaving strong chemicals on the surface too long, and test new products on a small hidden area first.
For guidance on the rest of the bathroom, View the full bathroom cleaning guide.
A Quick Note on Safety
Some bathtub cleaning tasks involve stronger chemicals, particularly when dealing with mold, mildew, or stubborn stains. Always follow the product label for contact time and ventilation instructions. Never combine bleach with ammonia, vinegar, or other acidic cleaners, since this can release hazardous fumes. Wear gloves when using stronger commercial cleaners, and keep the bathroom ventilated during and after use. If mold keeps returning despite regular cleaning, the issue may be moisture-related and worth having assessed professionally.



Leave a Reply